This chapter describes you how to use Convertigo backend objects to connect your data.
Connecting to Data
Connect to Rest Web Services
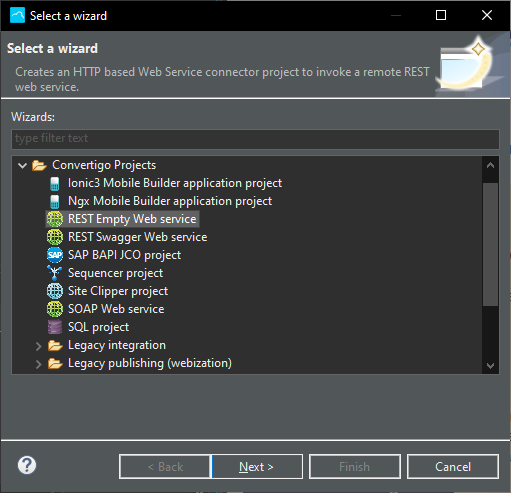
Convertigo features the HTTP Connector able to connect and consume Rest API Web Services. To create a new REST project, click New > File > Project… > Convertigo Projects > REST Empty Web service. This template will do most of the work, but you can also manually create an HTTP Connector in any existing project by Right Click on project > New > Connector > HTTP Connector. The Connector will be placed in the Connectors folder.
Choose a name wisely ;)
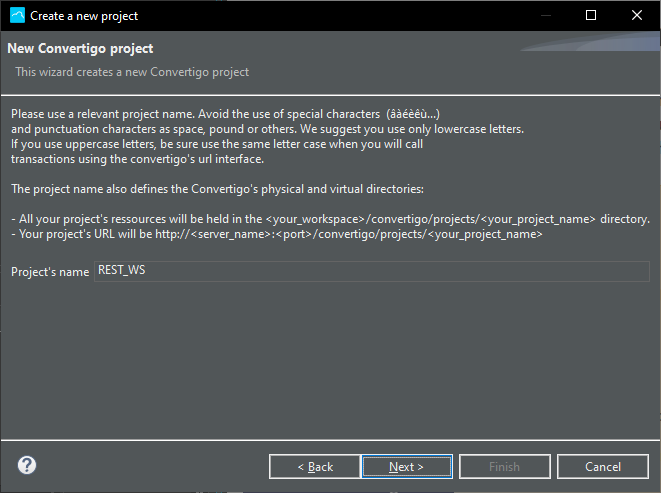
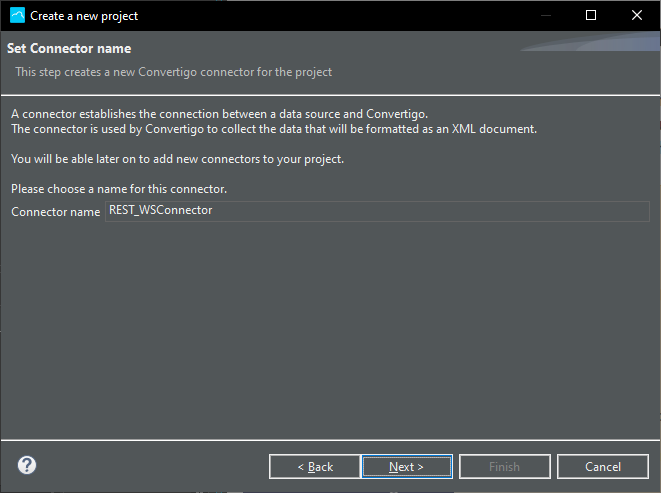
You have the possibility to give the HTTP connector a name
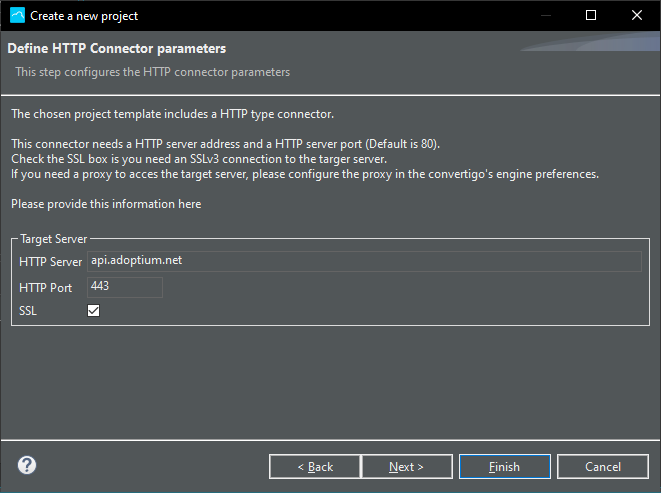
In next screen, set the address of the Rest Web Service to connect to. (Do not type http:// or https://) as this is automatically computed according to the SSL setting).
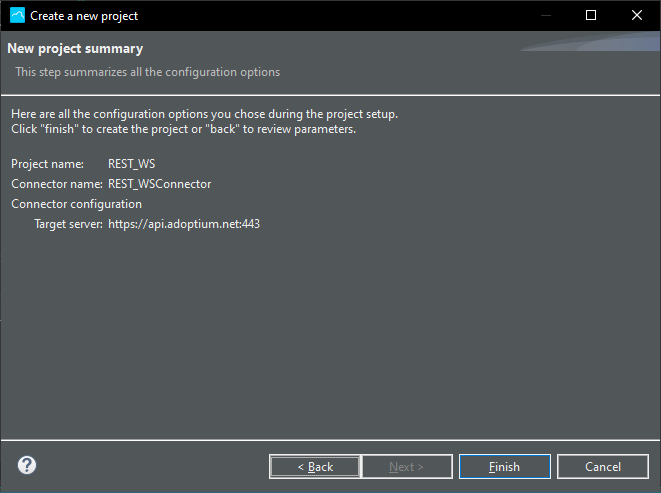
Last screen is a summary of all entered parameters for the Connector. Click Finish
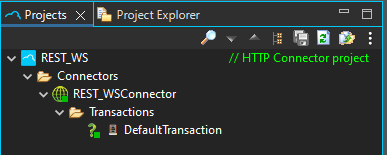
The project is created in the Studio, in the Projects view
There are two ways of creating Connector and Transactions. If the Web Service has a YAML or JSWON openAPI definition (Swagger definition) you can import it and transactions will be automatically created or else you can manually set up the transactions.
Manual transactions
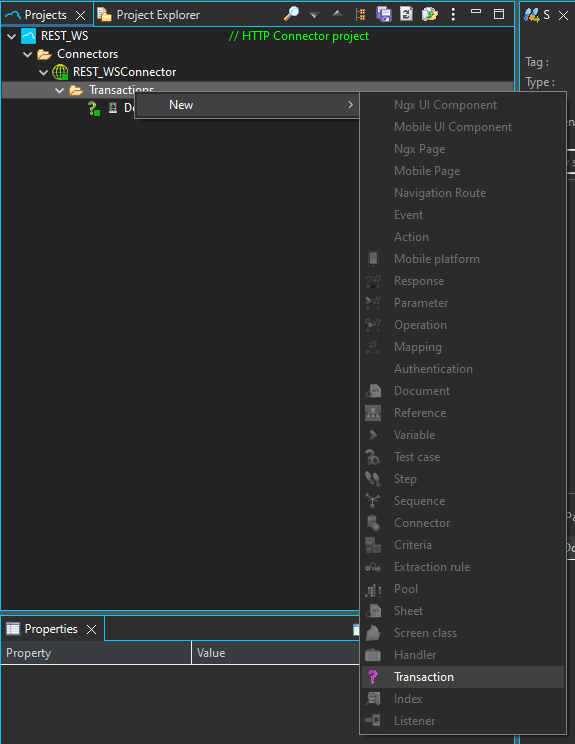
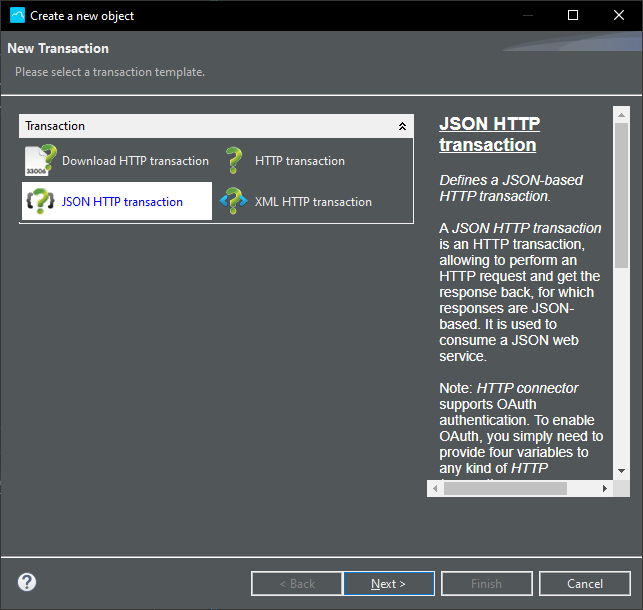
Right-click the Connector or its Transactions folder, then select New > Transaction
Depending on the target Rest Web Service choose the appropriate transaction type:
- XML HTTP Transaction will consume XML based REST Webservices (Data returned by the web services in XML format), mostly for XML/RPC type of web services
- JSON HTTP Transaction will consume jSON based REST Webservices (Data returned by the web services in jSON format), mostly for standard RESTful web services available today.
- Download HTTP Transaction will consume Binary based REST Webservices (Data returned by the web services in Binary format), mostly for downloading data in Binary format.
- HTTP Transaction will consume a REST based on unknown format. The data will be returned as raw data, you will have to parse by hand.
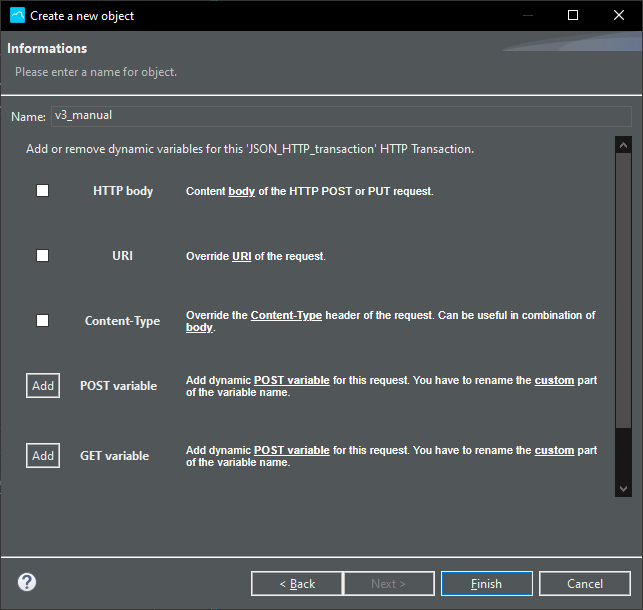
Give the transaction a name, add built-in and/or custom variables (they can be edited or added later). These variables will enable you to invoke the transactions with a given BODY, ContentType or any other POST or GET element in the HTTP Request.
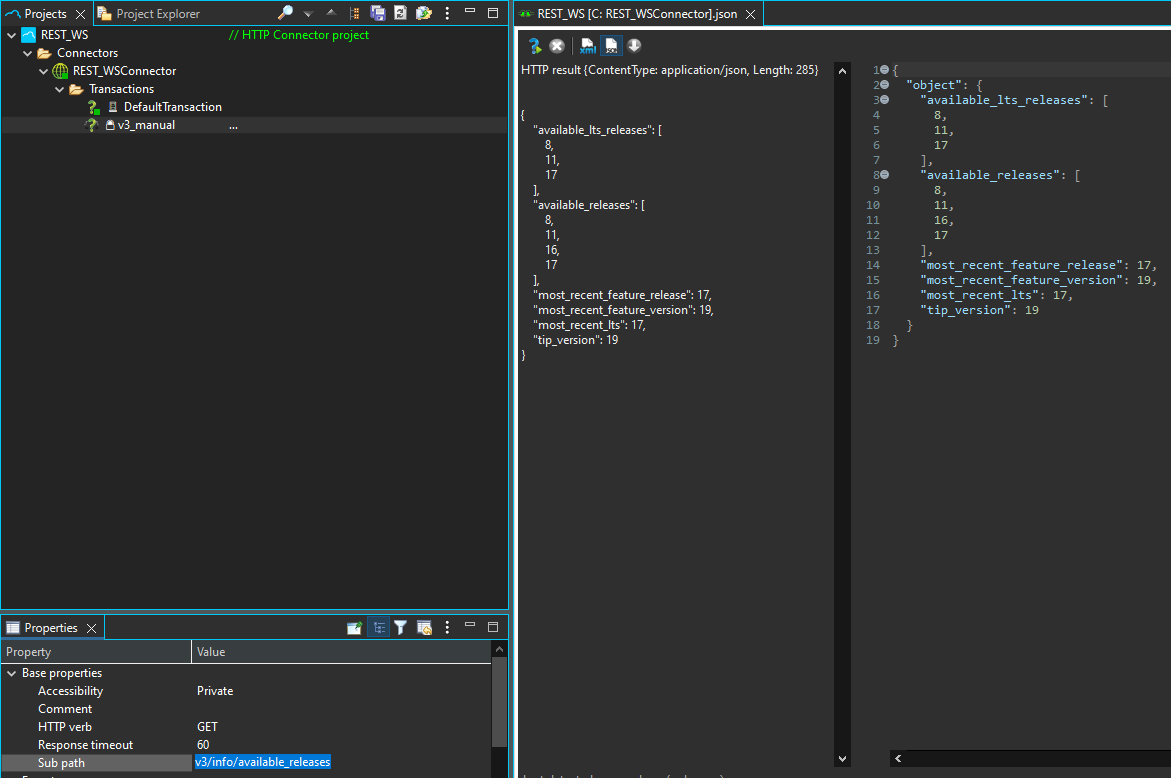
Once the Transaction is created, you can right-click the transaction > Execute or press F5 key to execute transaction to test it and get results.
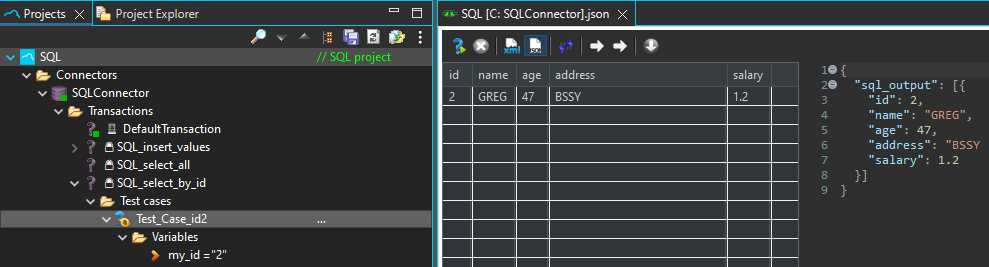
Also you can add a Test Case to it (Right Click o Transaction->New->Test Case) and set values in Variables to test your Transaction with a Given set of Input Variables. To set the value in a Variable, give the value in the Default Value Test Case variable’s property.
Importing REST WS schema
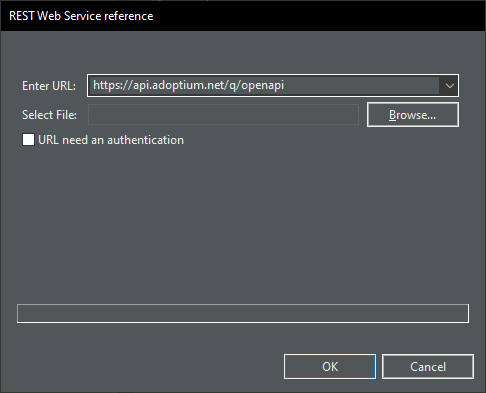
Right-click your project > Import REST WS reference
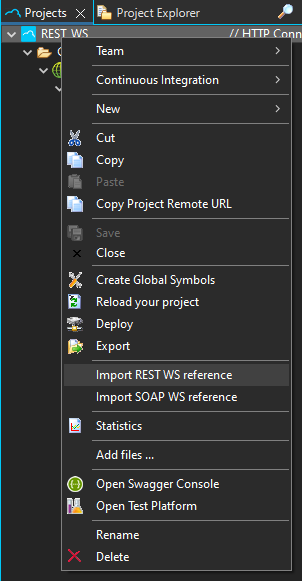
Enter URL of the REST schema or browse a local file to import
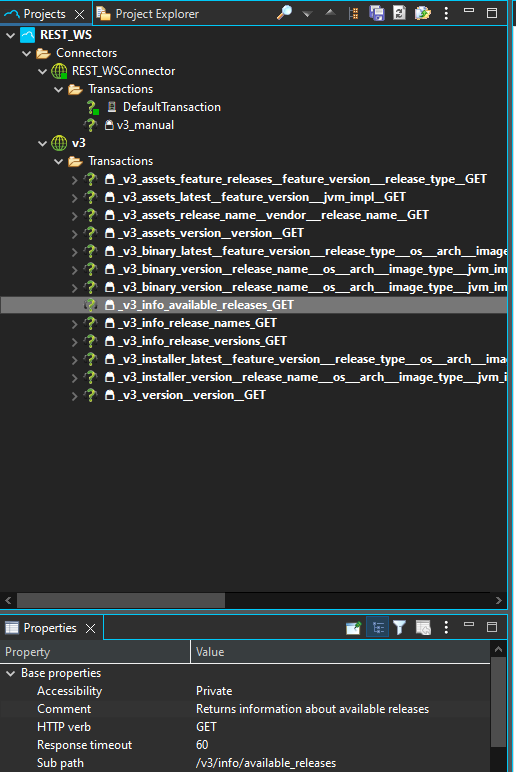
API methods are automatically created as transactions of the corresponding type
You can easily create the Call Transaction Step by dragging and dropping the transaction a sequence with CTRL key (Windows) or Command KEY (Mac) pressed
To update transaction schema to be used in Sequence Source picker, execute the transaction at least once, right-click it and select Update schema from current connector data

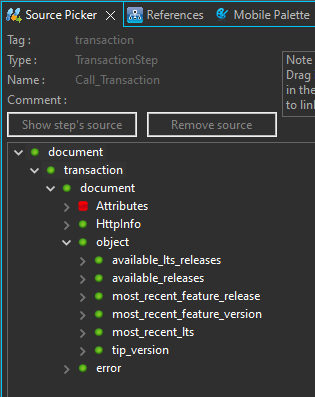
Double-click your Call Transaction Step to refresh and display schema in the Source picker tab
Connect to SOAP Web Services
Convertigo HTTP connector is able to connect to SOAP Web Services (XML messaging) through the import of a WSDL file or url.
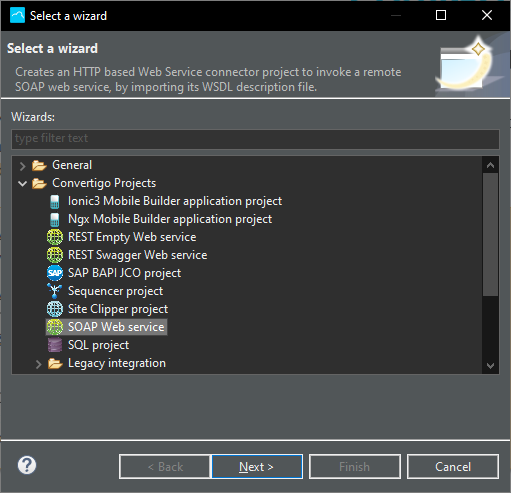
To create a new SOAP project, click New > File > Project… > Convertigo Projects > SOAP Web service.
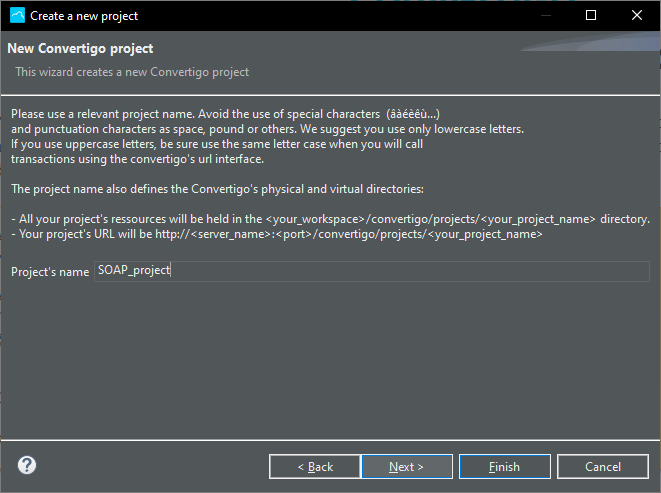
Give your project a name
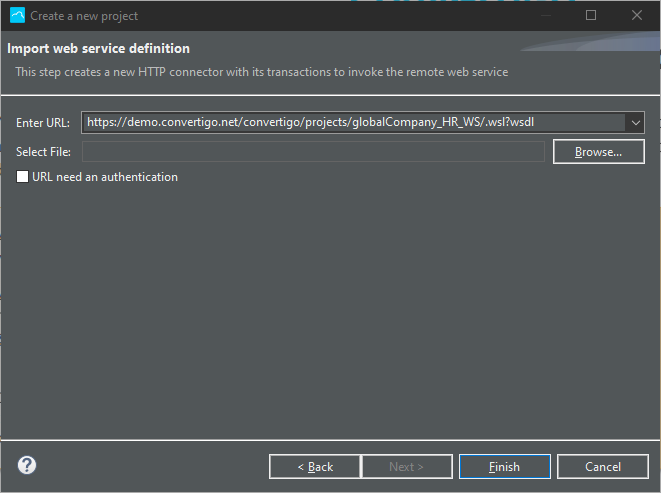
Next screen will ask for an URL or a file to the distant SOAP Web Service WSDL.
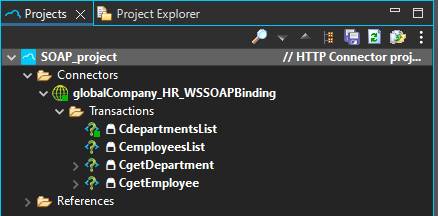
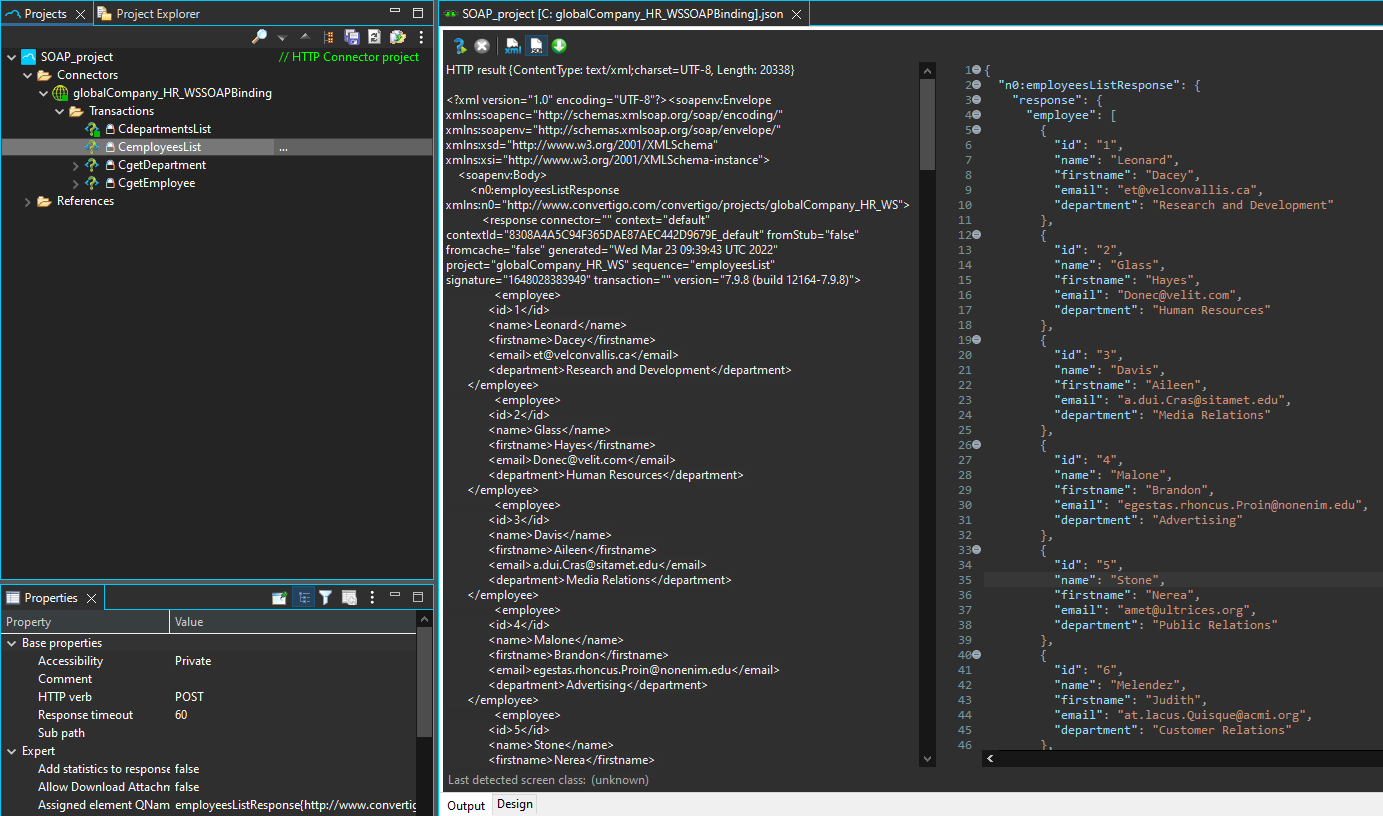
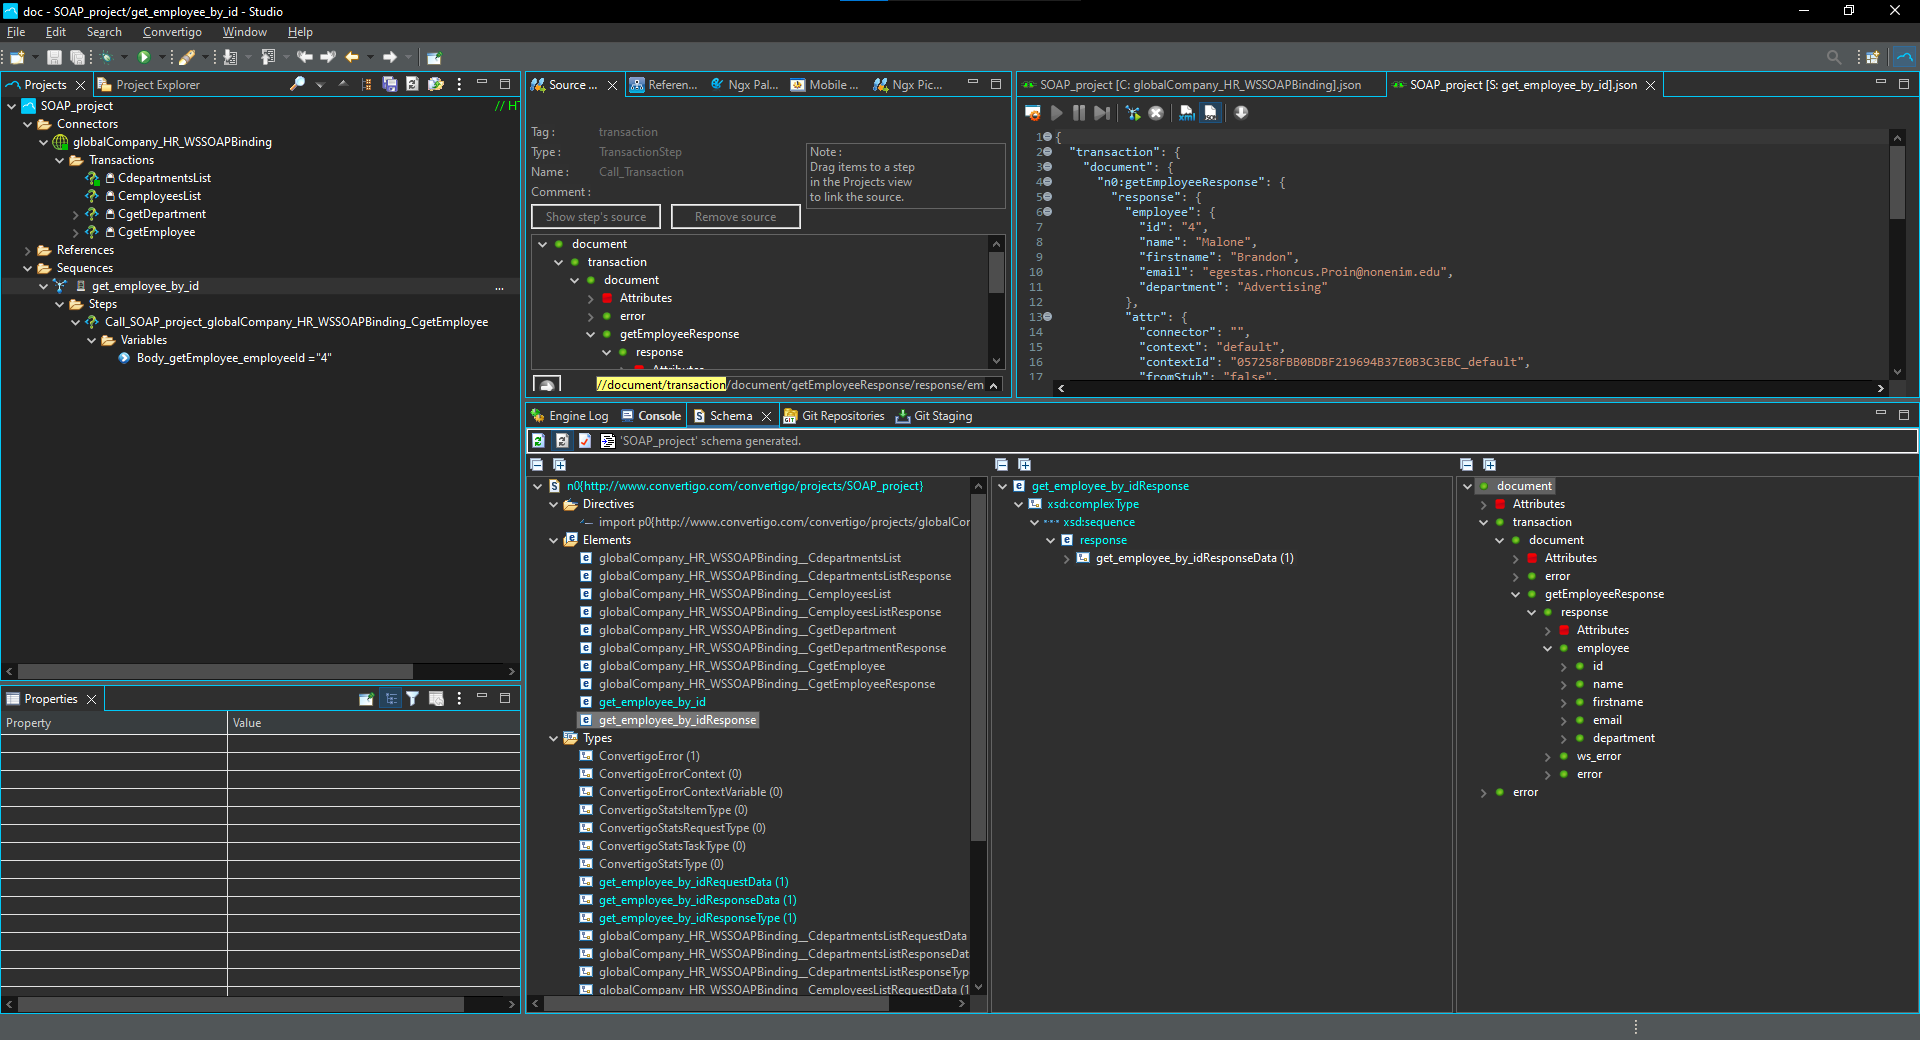
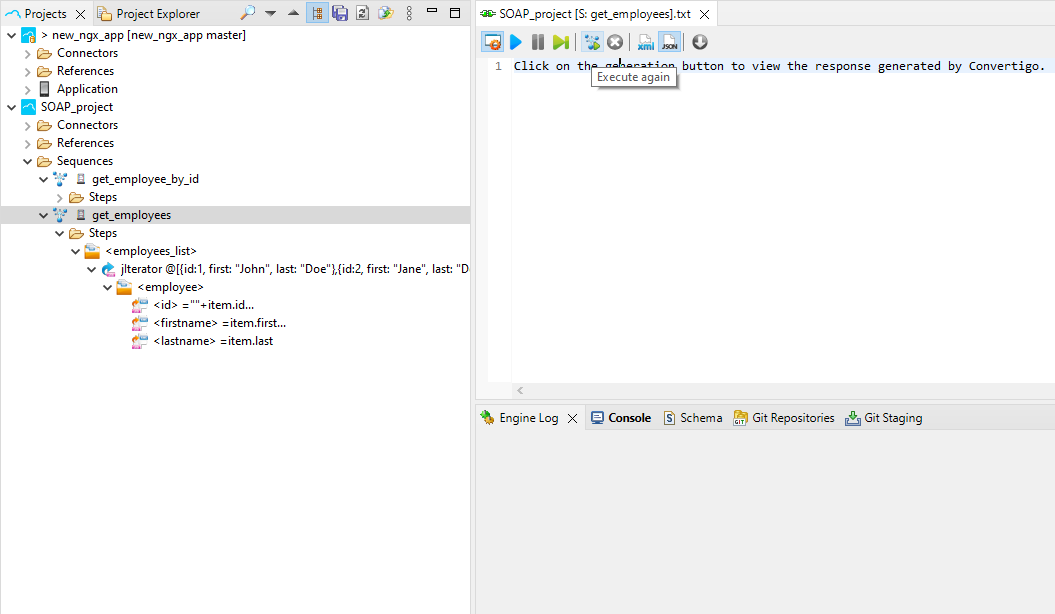
The HTTP Connector is automatically created and named. XML HTTP Transaction are also automatically created and named by the SOAP method name and prefixed by a ‘C’
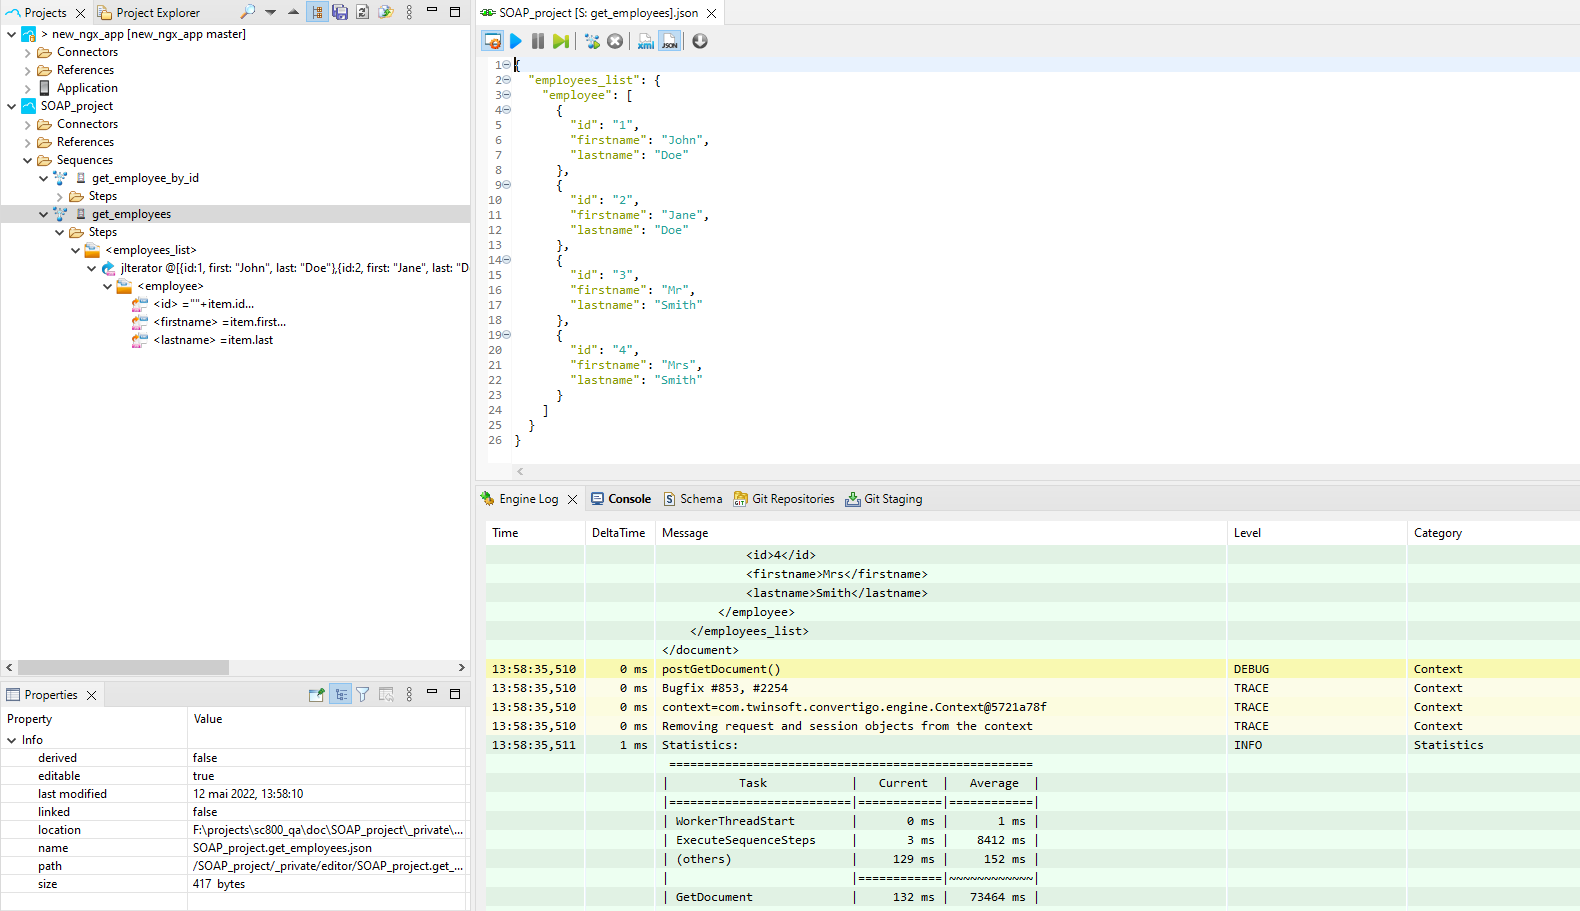
You can right-click the transaction > Execute or press F5 key to execute transaction to test it and get results. Left Panel is the Raw response of the WS and right panel is the XML or JSON response as seen in the transaction itself
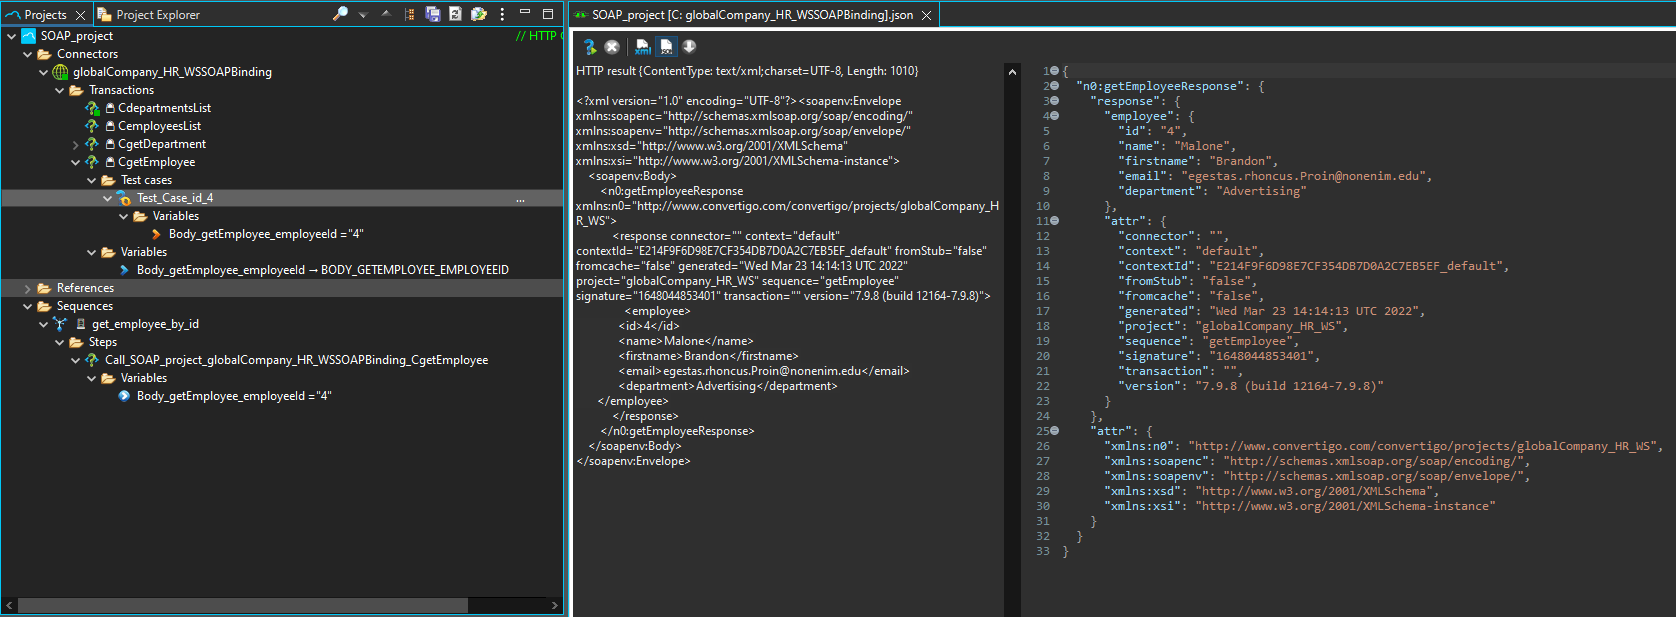
You can test the other WS methods that require variable values using Test Cases.
You can easily create the Call Transaction Step by dragging and dropping the transaction a sequence with CTRL key (Windows) or Command Key (Mac) pressed
No need to update the transaction schema for the Sequence Source Picker, it was automatically created when the WSDL was imported.

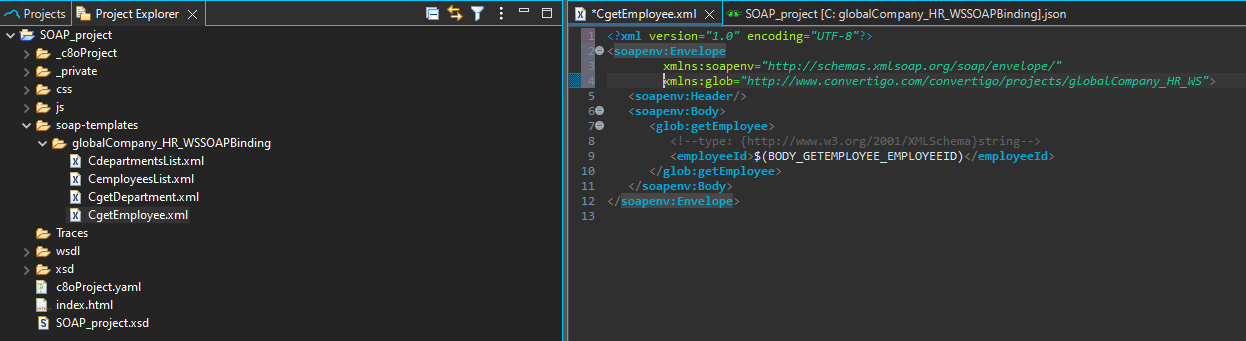
In the Project Explorer view, you will see the SOAP templates in the soap-templates folder. This can be edited at your convinience (variable name, etc…).
Connect to SQL Databases
The SQL Connector is able to connect to different Database Servers:
| Supported Database | Driver |
|---|---|
| mySQL | com.mysql.jdbc.Driver / com.mysql.cj.jdbc.Driver (V8+) |
| MariaDB | org.mariadb.jdbc.Driver |
| Microsoft SQL Server | net.sourceforge.jtds.jdbc.Driver |
| Oracle | oracle.jdbc.driver.OracleDriver |
| PostgreSQL | org.postgresql.Driver |
| HSQLDB | org.hsqldb.jdbcDriver |
| IBM DB2 on AS/400 | com.ibm.as400.access.AS400JDBCDriver |
| IBM DB2 | com.ibm.db2.jcc.DB2Driver |
| ODBC Bridge | sun.jdbc.odbc.JdbcOdbcDriver |
JNDI Database access is also available. In This case The database has to be referenced in the Application Server definition. This is only to be used in the case Convertigo Servers are deployed in J2EE Application Servers such as IBM WebSphere.
You can also add any other JDBC driver dynamically by adding the driver’s JAR file in the /libs folder of your project. When you project will be deployed to the Convertigo server, it will be usable from your project. You will just have to know explicitly the driver URL to access it.
Create a SQL Connector based project
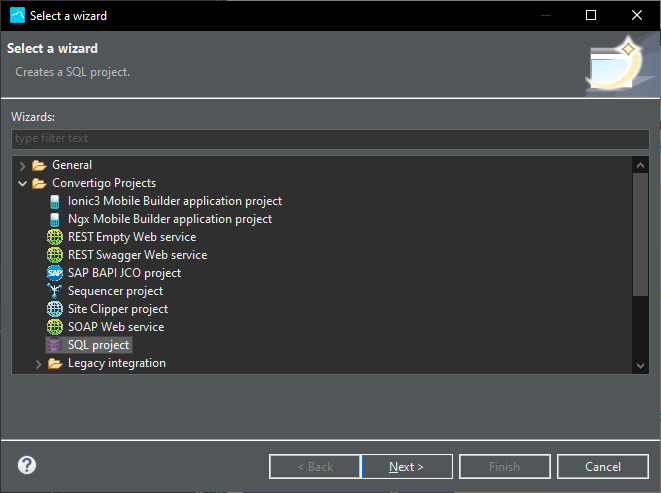
To create a new SQL project, click New > File > Project… > Convertigo Projects > SQL project
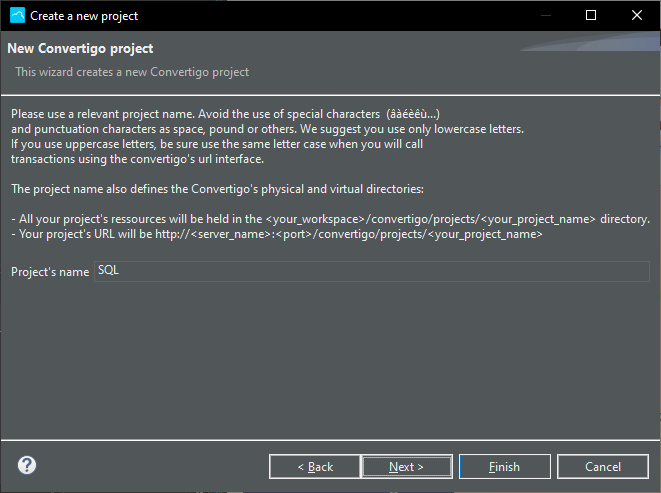
Choose a name for the project
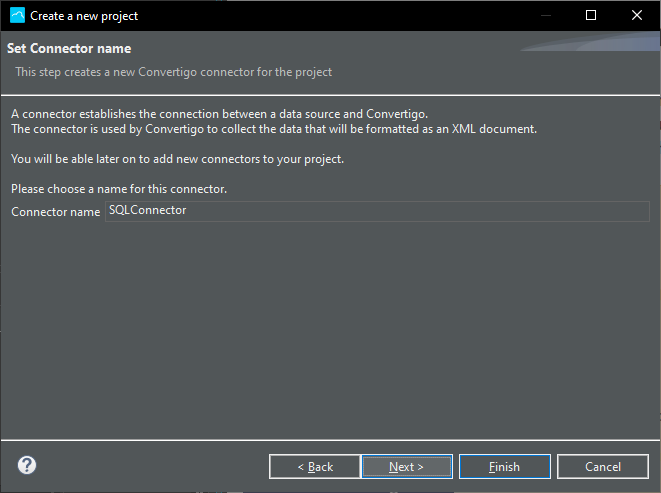
You have the possibility to give the SQL connector a name
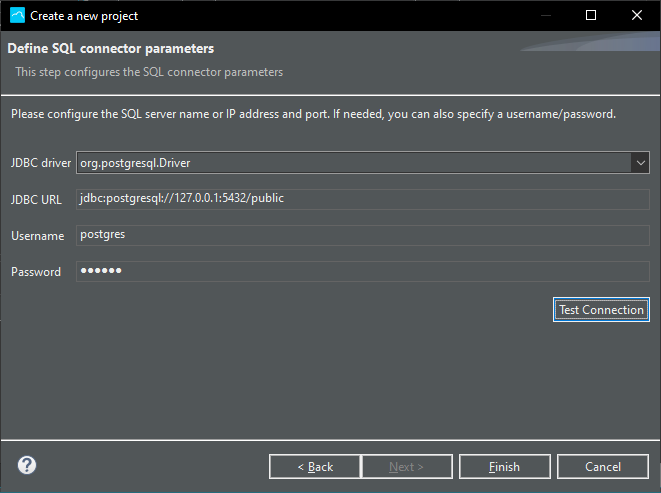
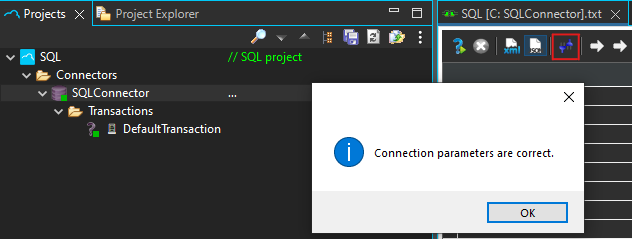
In next screen, choose the JDBC driver for your database connection and enter JDBC URL from proposed template. Fill in Username and Password, if needed. You can test the connection to the database using the Test connection button.
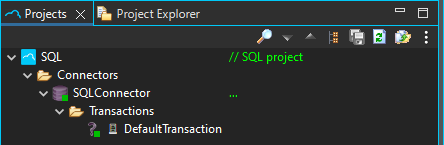
The project is created in the Studio, in the Projects view
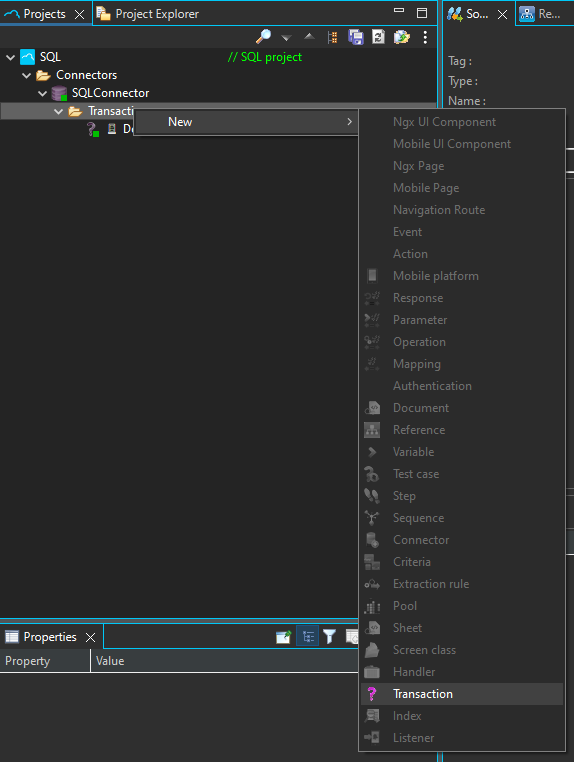
To create a new SQL query, create a new SQL transaction. Right-click the Connector or its Transactions folder, then select New > Transaction
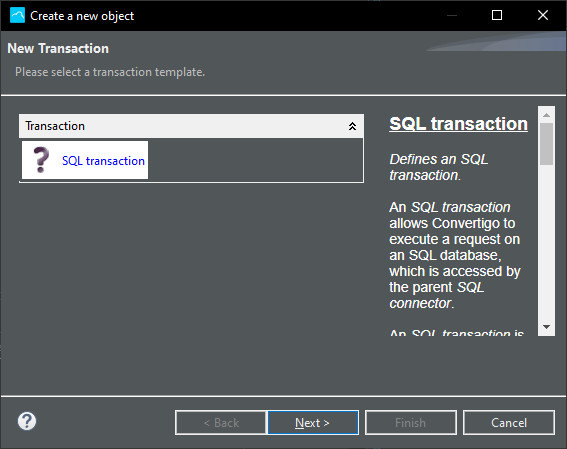
There is currently only one transaction type, choose SQL transaction
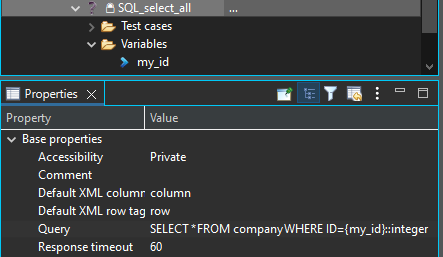
In the final wizard page, you have the possibility to write your SQL query. Enclose transaction variables (dynamic values) with brackets {my_variable}, this will also automatically creates the variables.
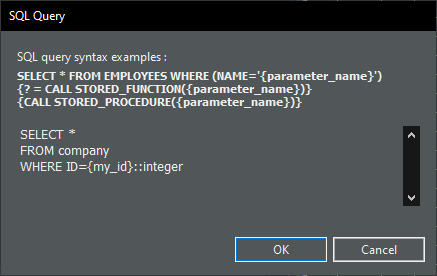
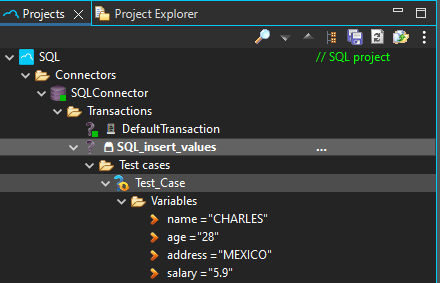
my_id transaction variable has been automatically created in the SQL transaction. Convertigo variables are String based variables. Some Database Servers need the data to be casted to the correct type (::integer for PostgreSQL query, for example)
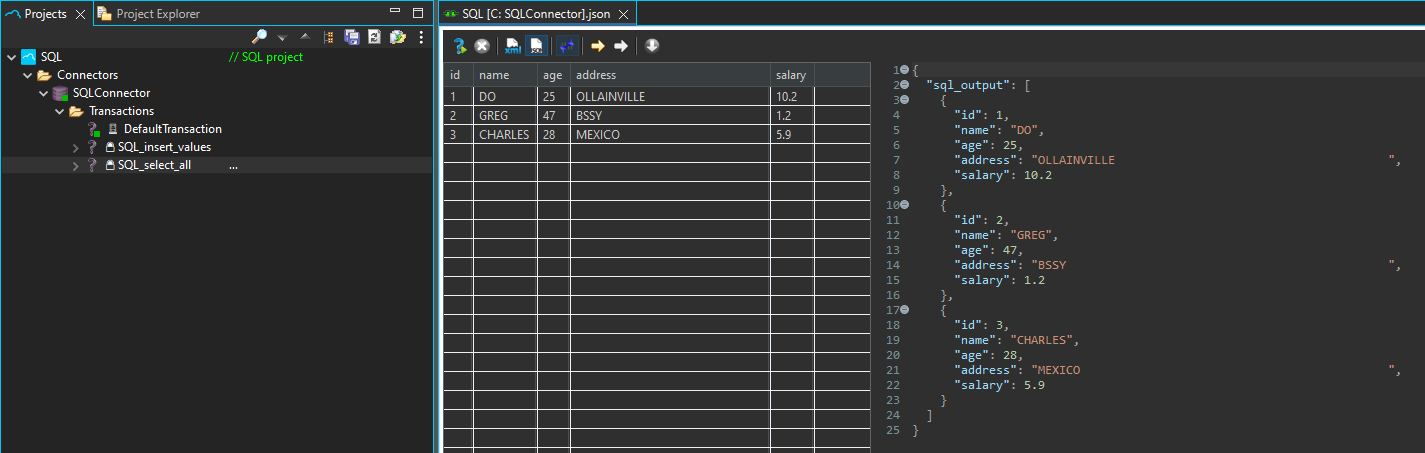
If you double-click the SQL connector this will open a Tab with the Connector buttons and the transaction response data.
If you haven’t checked already, there is a button to test connection to your database.
Right-click the transaction > Execute or press F5 key to execute transaction and get result
If your transaction requires dynamic data, use Test cases as below
You can easily create the Call Transaction Step by dragging and dropping the transaction a sequence with CTRL key down
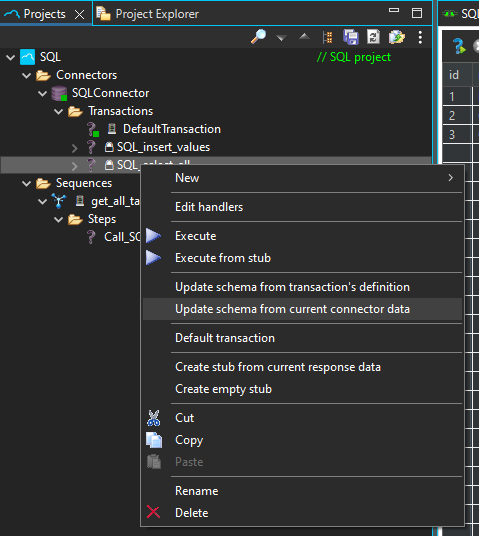
To update transaction schema to be used in Sequence Source picker, execute the transaction at least once, right-click it and select Update schema from current connector data or Update schema from transaction definition
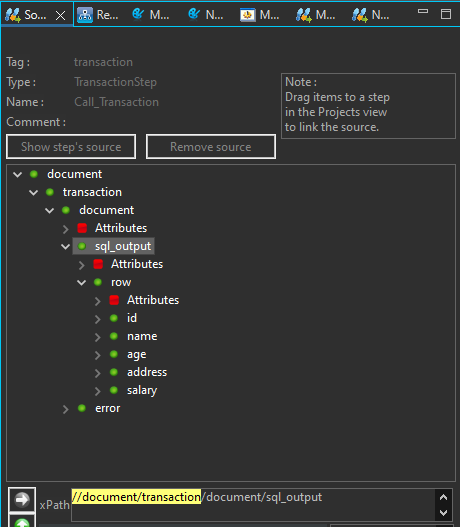
Double-click your Call Transaction Step to refresh and display schema in the Source picker tab
Connect to NoSQL Databases
Connect to SAP NetWeaver Systems
Understanding Data schemas
In Convertigo, all data coming from connectors are described by Schemas. This description is based on the XML Schema https://www.w3schools.com/xml/schema_intro.asp, and is automatically handled by Convertigo Studio.
Schemas Can be displayed in the Schema View
By Default, Convertigo is not aware of the Structure (Schema) of data retrieved from a Connector, except when :
- The Connectors have been created from some Structured definition files (Import SOAP or REST YAML/JSON Swagger web Services)
- The Connector has been Created by importing SAP BAPI Transactions
The Schemas Are used in various parts of Convertigo Studio and mainly in all Source Pickers to display the Structure of the data to bind from Step to Step or to bind from a Service to a FrontEnd UI.
This is why it is important to describe the Data Schema of Connector’s transactions to Convertigo. This easy to do as Convertigo provides 2 commands to generate Schemas:
-
Execute a Transaction to retrieve some data (F5 when the Transaction is selected), Right Click on a Transaction, and use the Update Schema from Current Connector data. This will use the current data displayed in the connector as model to generate a response Schema for this this Transaction. The response schema will be seen in the Schema view as <ConnectorName>_<TransactionName>_ResponseData.
Note: Note that transaction's request data schemas are Automatically generated by Convertigo as <ConnectorName>_<TransactionName>_RequestData. -
You can also use the Update Schema from Transaction definition command. This will only work on Connectors where Convertigo can introspect the underlying data models, for example SQL Connector transactions.
Once the Schemas are generated, you will be be able to explore all the data structures in the Schema View and to use them in the Source Picker (back end data binding) and the Ngx Picker (Front End data binding).
Note also that Schemas for Sequences are automatically generated by Convertigo by exploring the Sequence Data structure steps. You will find them in the Schema view as <SequenceName>_RequestData and <SequenceName>_ResponseData
Building Backend Services
In Convertigo Back end services are called Sequences You can have as many Sequences in your projects, when called each Sequence will perform a backend flow executed on the Convertigo servers. Sequences can call Transactions to retrieve or push data to connectors, perform data structure transformations and compute business logic.
Sequences building blocks are called Steps. Each step is executed one other the other in Sequence (This is why we call this a Sequence…). Some steps will build data structures (JSON and XML Steps), some will control the flow of execution (Flow Control Steps) and others will handle miscellaneous tasks like authentications, session management and others.
Sequences can have Input variables that will be used during the execution to provide data used for flow control or for pushing this data to connectors. In a Sequence all variables are Strings, as the connectors are responsible for typing the data to the correct format.
Sequences can call Connector’s transactions and of course other Sequences (Sub Sequences) from the same project or from any other project in your workspace. This enables the concept of Sequences libraries projects providing sequences performing various tasks. By convention a library project is named as lib_<MyLibraryProject>
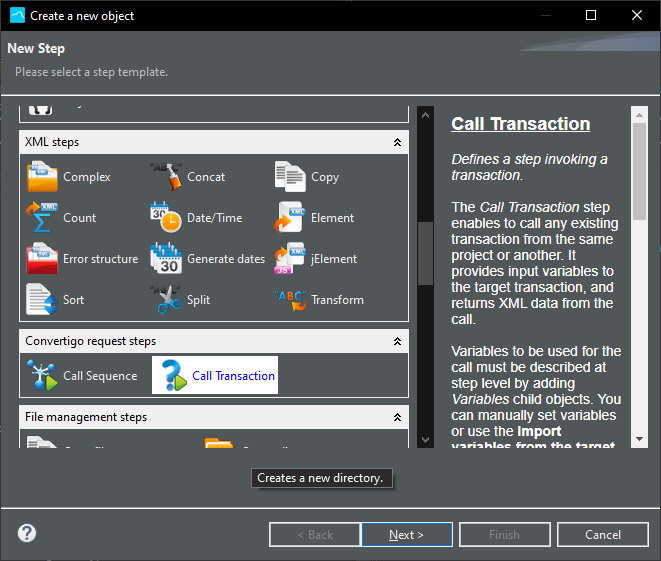
Calling Transactions
One of the most commons tasks performed by a Sequence is to call a Connector’s transaction. You can do this by using the Call Transaction Step
A Sequence can call a transaction from its own project or form any Other project installed in your workspace. When executed the Call Transaction Step Step will provide the data returned by the Connector as a Source to any other following step in the Sequence.
Understanding the “Source” concept
Sources are a key concept in Convertigo. The basic idea is that each Step can provide data to the following steps in the execution flow. So, a given step can ‘Source’ some data from an other step previously executed.
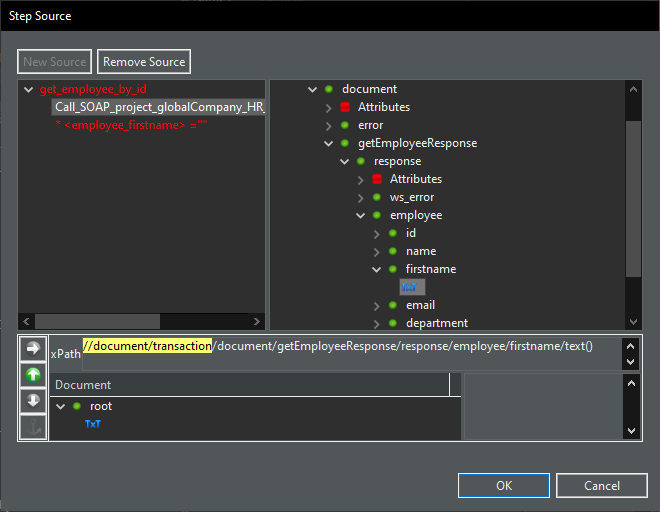
The Source Picker Tool will display the data structure tree provided by a step when you right click on a step ->Show in Picker
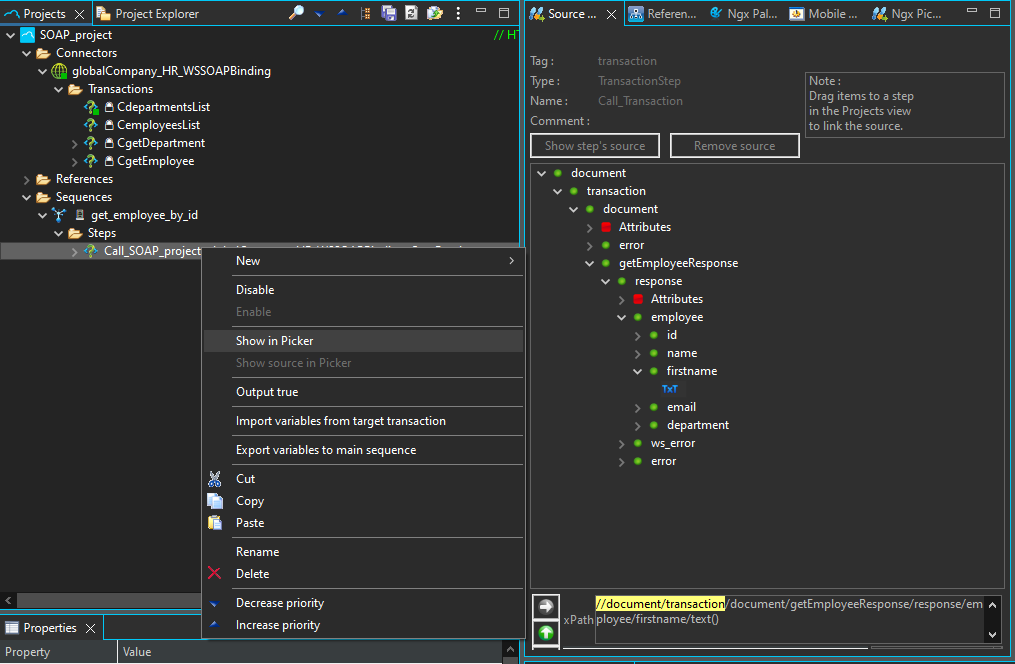
If you want to link (We can also say ‘Source’) data provided by a step to an other Step, you will just have to Drag & Drop the wanted tree element TXT to the destination steps.
An other way to do this is to use the Source property of a Step and click on the […] button to open source selector window.
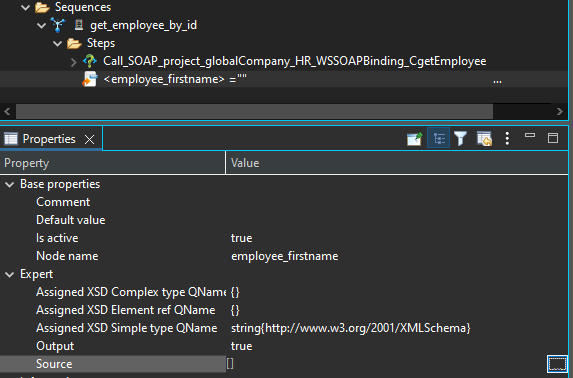
Select the Step from where you want to ‘Source’ data from. (All Red Steps can not be sourced as they will be executed after your step) And pick in the tree data structure the TXT element you want to bind to your step.
XPath models
XPaths are a way to point to the data structure elements values we will want to source. This follows a standard syntax described here. In most cases, the source picker will generate for the you a Valid XPath so you do not have to bother so much about this. You can include dynamic JavaScript expression using {{{ expression }}}. You can find below some very common XPath Use cases:
| XPath sample | Usage |
|---|---|
| /data1/data2/data3/text() | Will select the data3 node value if there is only one data3 occurrence in the structure or all data3 values (concatenated) if there are several occurrences of data3 |
| /data1/data2/data3[1]/text() | Will select all the first data3 occurrence value |
| /data1/data2/data3[@orginalKeyName = ‘MyKey’]/text() | Will select the data3 occurrence having a attribute ‘originalKeyname’ equal to ‘MyKey’ |
| /data1//data4/text() | Will select all data4 node values that are under the data1 node whatever is their tree depth |
| /data1/data2/data3[@name = ‘{{{ myVarName.toLowerCase() }}}’]/text() | Will select the data3 occurrence having a attribute ‘name’ equal to the dynamic JavaScript expression myVarName.toLowerCase() |
XPaths are a powerful selector tools to be able to ‘Source’ data from any structure.
Build logic flows
Sequences can have logic flows such as If/The/else decisions, Iterators and loop or Parallel executions. The execution is based on a graphic tree as follow :
- For If steps, every step under a If node will be executed if the If condition matches. If not the flow will continue to steps on the same level.
- For If / Then / Else steps, every step under the Then Step will be executed if the If condition matches. If not all the steps un the Else will be executed. At the end the flow will continue to steps on the same level.
- For Iterators and loops all steps under an Iterator Step will be executed repeatedly for each Iteration. When the iterations are finished the flow will continue to the step at the same level.
- For Parallel steps, Each step under a Parallel Step will be executed at the same time. The sequence will resume to the next Step at the same level when all the Steps finished their executions.

Iterate on patterns
Sequences can use iterators or Loops Steps to perform several times step executions. The most used step for this is the Iterator Step. The step’s source property will be used to know on what occurrences the Iterator Step should loop. You can use the Source Picker to bind the Iterator’s source to any previous step data structure holding multiple occurrences of data. for example if a Call Transaction Step returns this data structure :
{
    clients: [
        item: {
            id:"1",
            name:"test"
        },
        item: {
            id:"2",
            name:"test2"
        }
    ]
}
| XPath | Will Iterate on on |
|---|---|
| /clients/item | All item objects in clients |
| /clients/item/name | All name of item objects in clients |
| //item | All item objects |
| /clients/item[contains(./name/text(), ‘test’)] | All item objects where the name field contains the ‘text’ string |
As you see you can use the full power of XPath expressions to fine tune your iteration patterns. If you remember, all Steps can be a ‘Source’ to other Steps. This is also true for the Iterator step. The step can be sourced to get current Iteration data.
This is why in any Step under an Iterator you can source it from the Iterator with a given XPath. for example if the Iterator iterates on /clients/item :
| XPath | data |
|---|---|
| ./id/text() | Will represent the id value of the current iterated item in clients |
| ./name/text() | Will represent the name value of the current iterated item in clients |
Understanding variables
Any Sequence in Convertigo can have input variables. These variables can be used all along the Sequence execution flow and passed to Subsequences or Transactions. Variables can be accessed within the Sequence in 2 ways :
- By Using the Input Variables step. This step is generally the first step in a sequence and represents all the Input Variables of the sequence. Any other step can ‘Source’ a given variable from this step.
- The variable is also automatically inserted in the JavaScript scope of the Sequence. You can access it within any SequenceJS or within any jXXXX type of step such as jIf or jDoWhile
Variables are not typed and are always considered as Strings. It is the Sequence (And Connector) responsibility to handle type conversions properly. For example if you a variable is passed to a SQL connector Transaction, be sure in the Transaction’s SQL request to properly CAST this variable to match a give SQL table column type.
Sequences variables will also appear in the Front End builder as CallSequence Variables you will be able to bind to UI components.
Compute data & business logic
Integrating JavaScript code
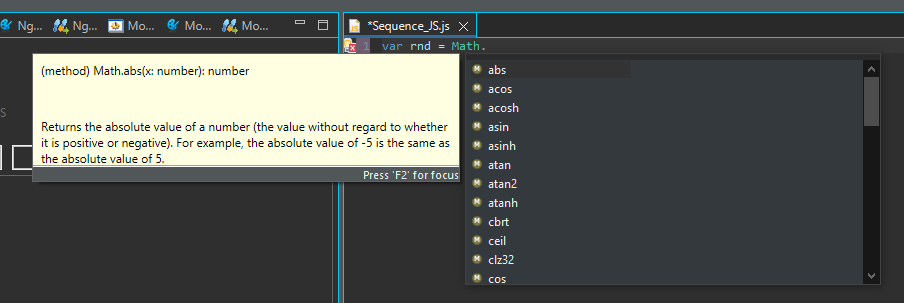
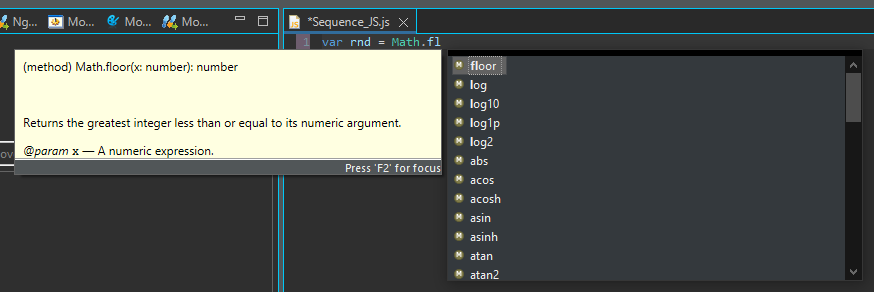
To write JavaScript code in a Sequence use the Sequence JS step. There is completion for some standard JS objects and functions.
Once a JavaScript variable is declared, it is available in all JS Steps of the Sequence. Variables of a sequence are automatically added to the JavaScript scope of the Sequence and are available as Strings by their name.
JavaScript variables can come from JS Steps too (JSimpleSource, etc…) and are accessible in a Sequence JS step where they can be modified. You can also access JS variables and modify them directly in a jElement Step, for example, in the ‘Expression’ property of the Step, but this is a one line editor. For longer script, use preferably a Sequence JS step.
Calling some java code
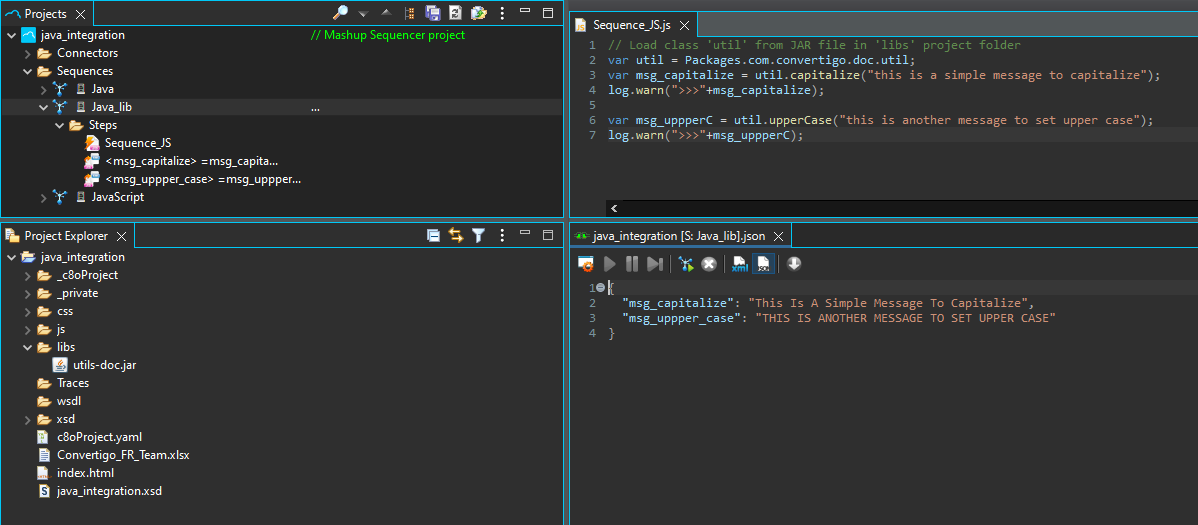
To write Java invocation code in a Sequence use the Sequence JS step. You will just have to write the full package name to reference the Java class. For the standard JDK classes there is completion for the classes and methods.


Using third party java libraries
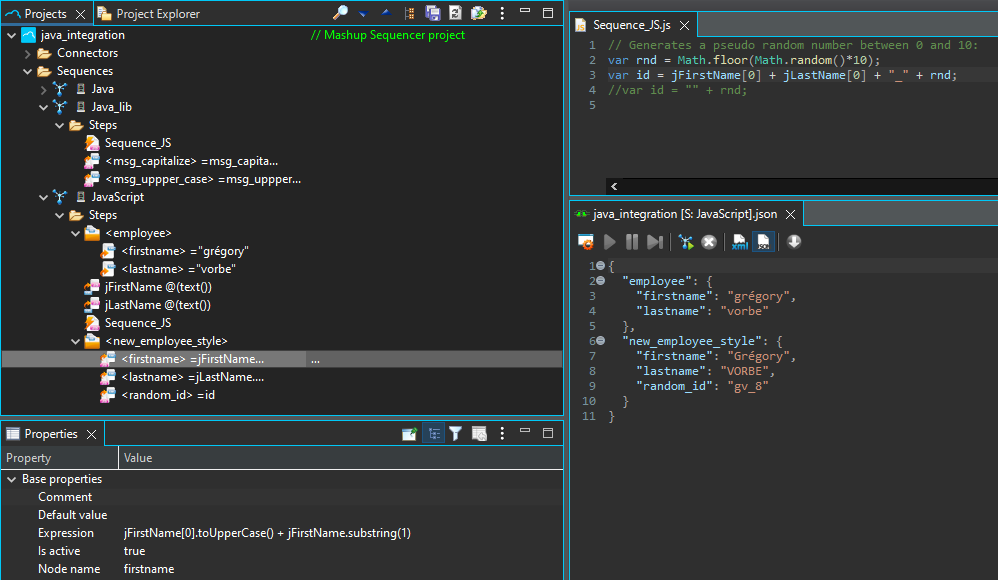
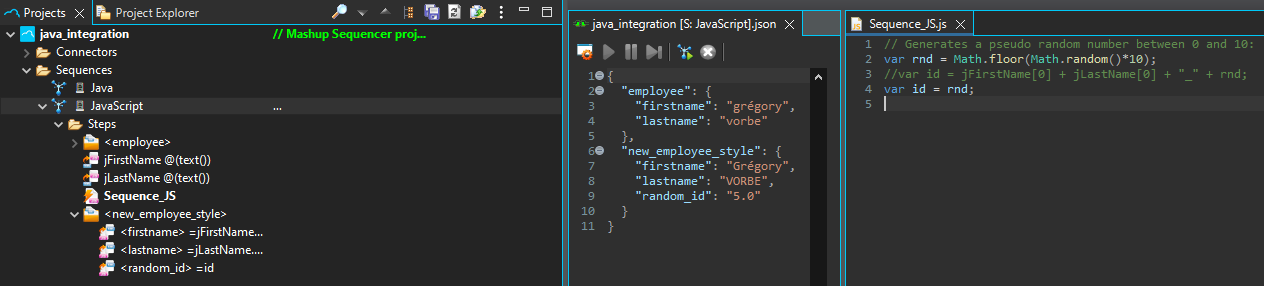
To use external Java libraries, copy the classes or JAR files in a folder called ‘libs’ in your project. Then, write your Java invocation code in a Sequence JS step. There will be no completion though. You will just have to write the full package name prefixed with the word ‘Packages’.
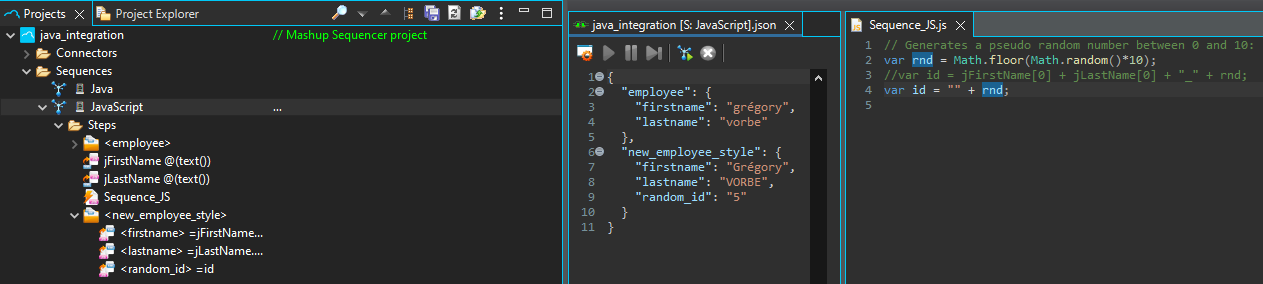
Often, to display and use properly variables data, you will have to convert them to Strings. To do so, just add an empty string to it (empty double quotes).
Using third party JavaScript libraries
To use an external JS library, copy the JS file in your project and in a Sequence JS Step use function ‘**include(“
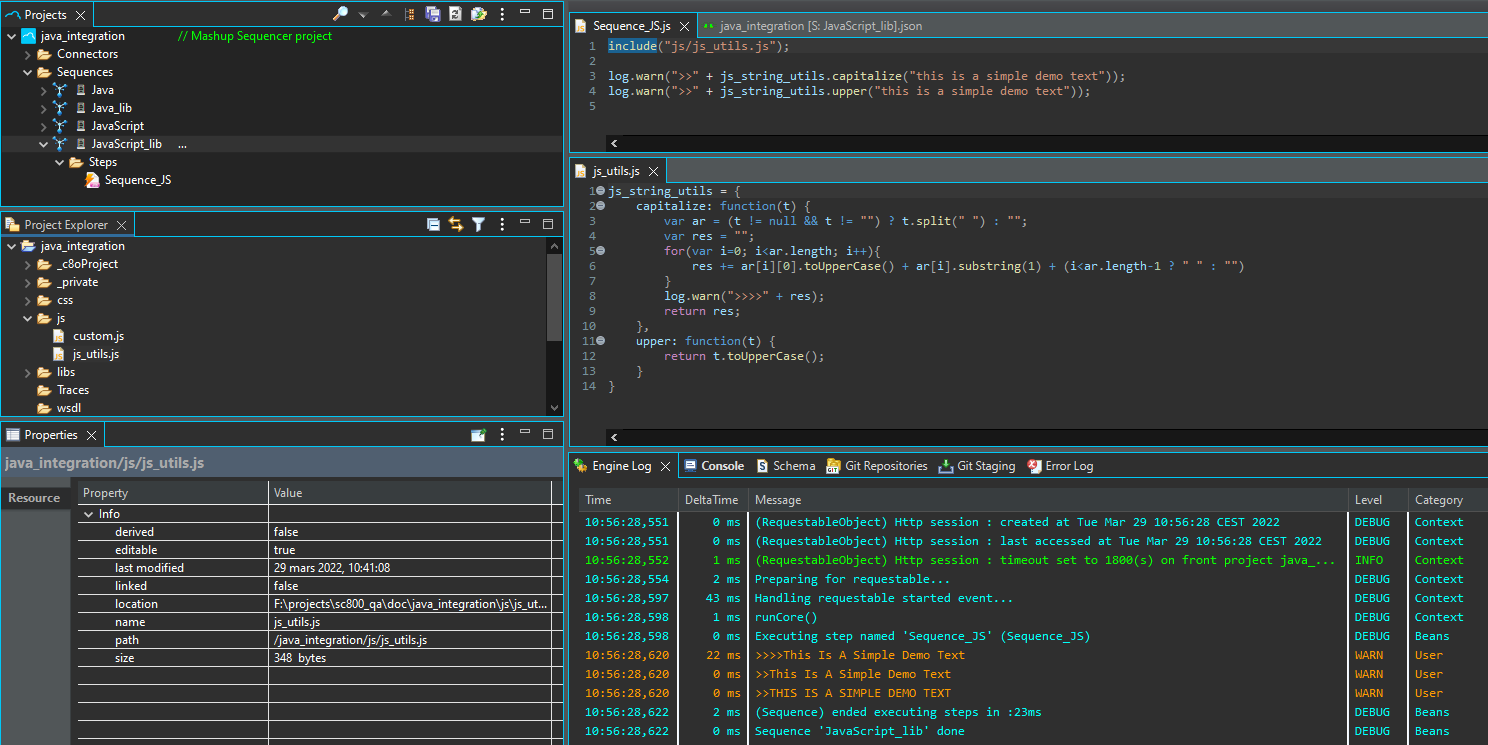
Reading & Writing data files
Convertigo has different Steps to Read or Write data files from different formats (XML, CSV, JSON). You can also write your own data file reader/writer in a Sequence JS step using Java.
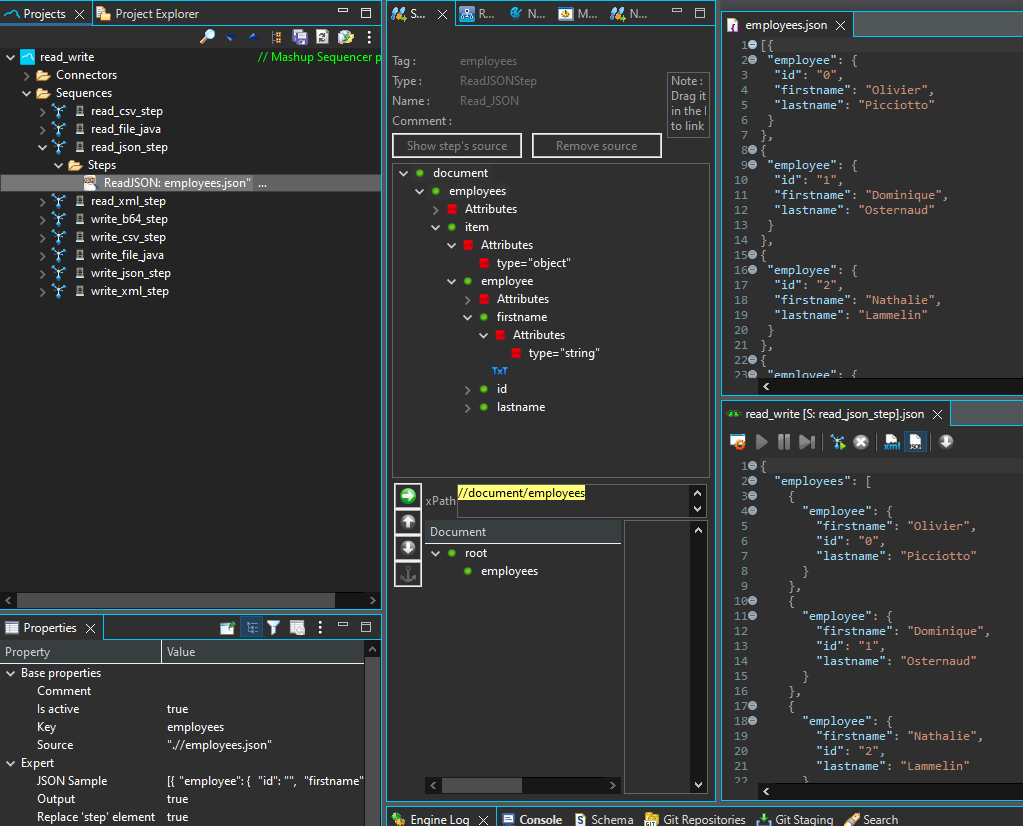
Read JSON Step
Use the Read JSON Step to load data from a JSON file.
| Property | Description |
|---|---|
| Key | Fill this property with a value for the parent object. |
| Source | This property is a Javascript field to fill with a file path. I can be an absolute path or a relative path using ./ (relative to the workspace folder) or .// (relative to the project folder) |
| JSON Sample | Fill this property with the result JSON structure in order to have a schema usable in the Source picker. |
If you double-click the Read JSON Step, it will update the Source picker schema.
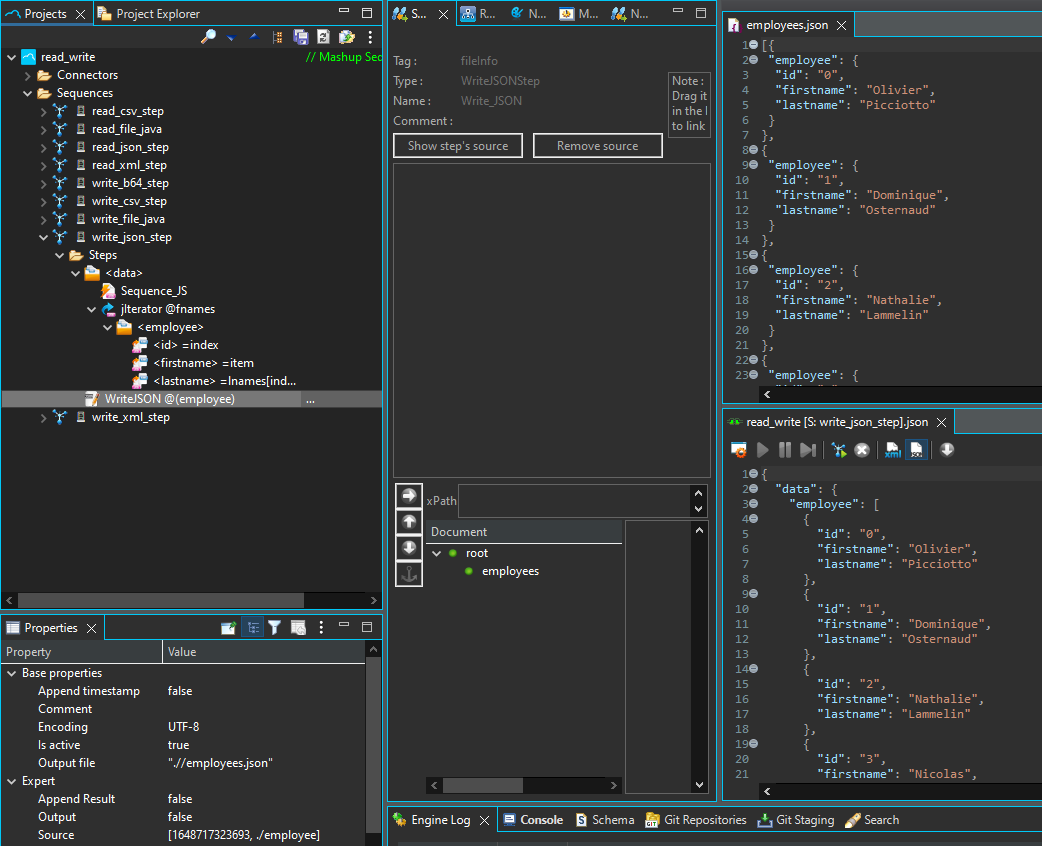
Write JSON Step
Use the Write JSON Step to write data to a JSON file.
| Property | Description |
|---|---|
| Encoding | Set the Encoding property with a value for the charset encoding (ISO-8859-1, UTF-8, …). |
| Output file | This property is a Javascript field to fill with a file path. I can be an absolute path or a relative path using ./ (relative to the workspace folder) or .// (relative to the project folder) |
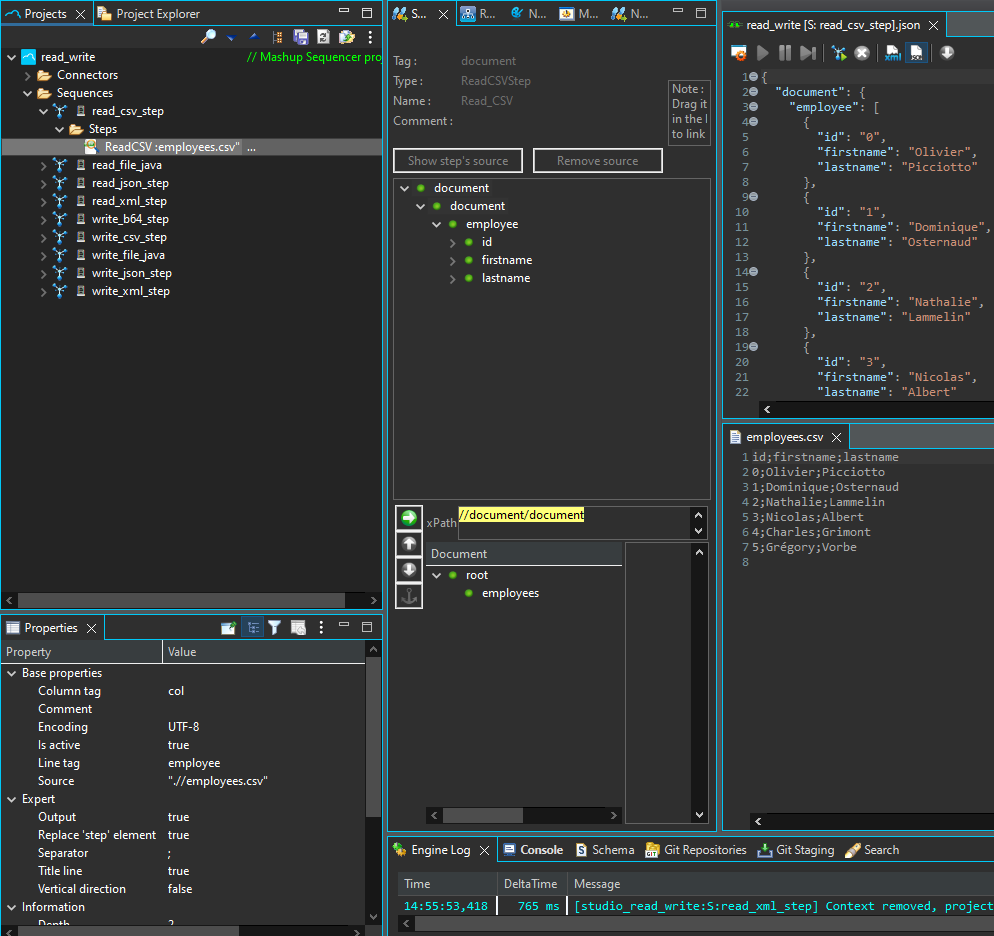
Read CSV Step
Use the Read CSV Step to load data from a CSV file.
| Property | Description |
|---|---|
| Column tag | Defines the columns tag name. Default value is col. Unused if Title line is set to true |
| Encoding | Set the Encoding property with a value for the charset encoding (ISO-8859-1, UTF-8, …). |
| Line tag | Defines the lines tag name. Default value is line. |
| Source | This property is a Javascript field to fill with a file path. I can be an absolute path or a relative path using ./ (relative to the workspace folder) or .// (relative to the project folder) |
| Separator | Defines the CSV default separator symbol. Default value is ;. |
| Title line | Defines whether the CSV file has a title line or not. If exists, the keys are named by the first title line of CSV file. Default value is false. |
| Vertical direction | Defines the array reading direction. Default value is false (horizontal) |
If you double-click the Read CSV Step, it will update the Source picker schema.
Write CSV Step
Use the Write CSV Step to write data to a CSV file.
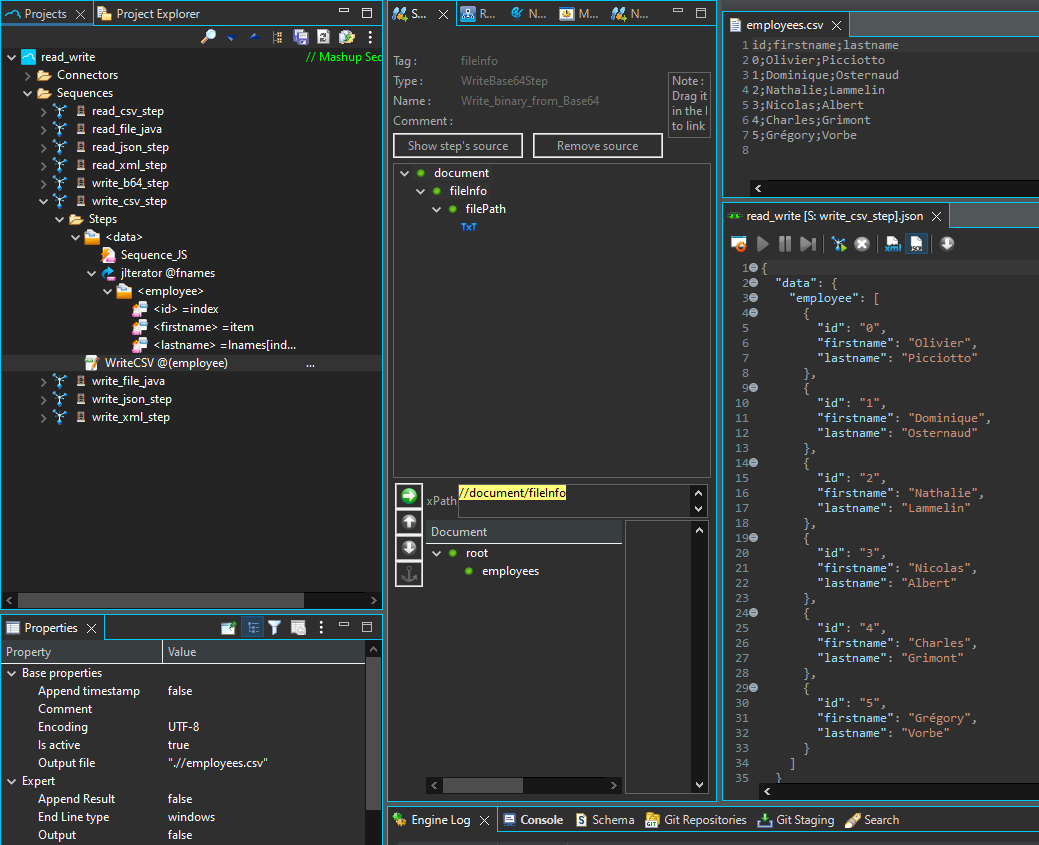
| Property | Description |
|---|---|
| Append timestamp | If true, yyyymmddHHmmssSSS format is concatenated at the end of file name. Default value is false |
| Encoding | Set the Encoding property with a value for the charset encoding (ISO-8859-1, UTF-8, …). |
| Output file | This property is a Javascript field to fill with a file path. I can be an absolute path or a relative path using ./ (relative to the workspace folder) or .// (relative to the project folder) |
| Append Result | If true, add data result at the end of the file. Default value is false |
| End line type | Define the new line character for each row in file. Default value is windows |
Read XML Step
Use the Read XML Step to load data from a JSON file.
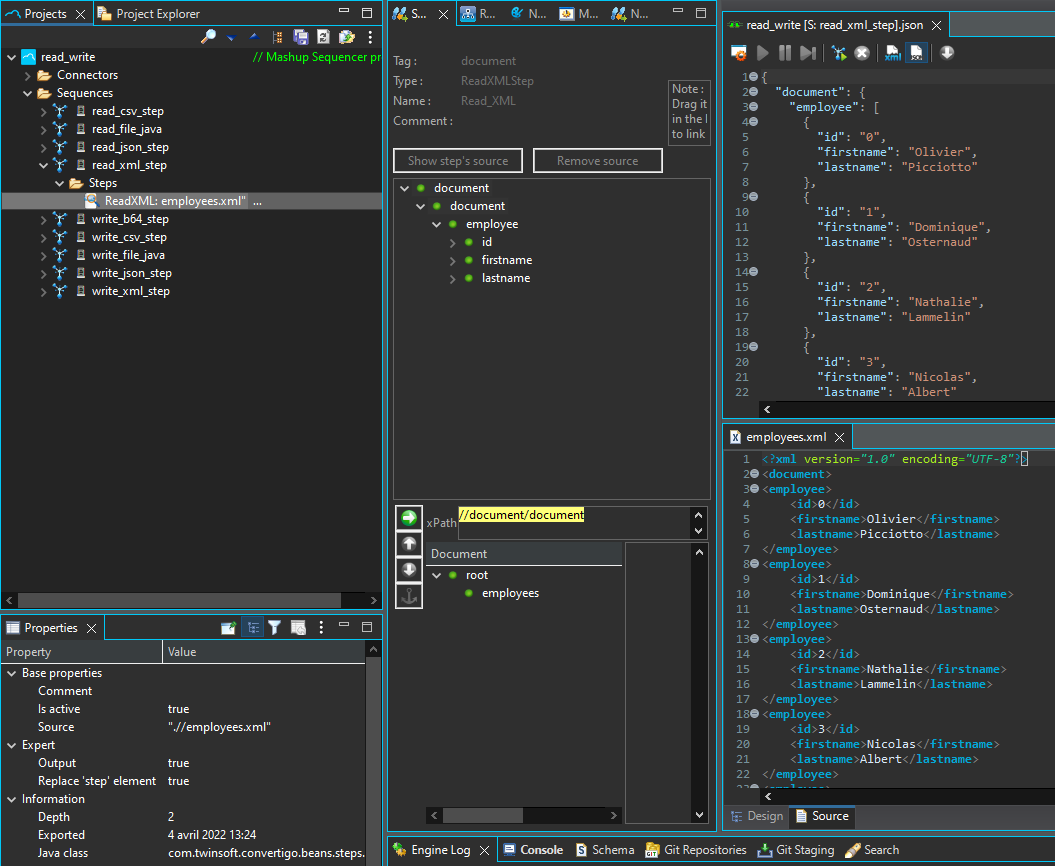
| Property | Description |
|---|---|
| Source | This property is a Javascript field to fill with a file path. I can be an absolute path or a relative path using ./ (relative to the workspace folder) or .// (relative to the project folder) |
If you double-click the Read XML Step, it will update the Source picker schema.
Write XML Step
Use the Write XML Step to write data to an XML file.
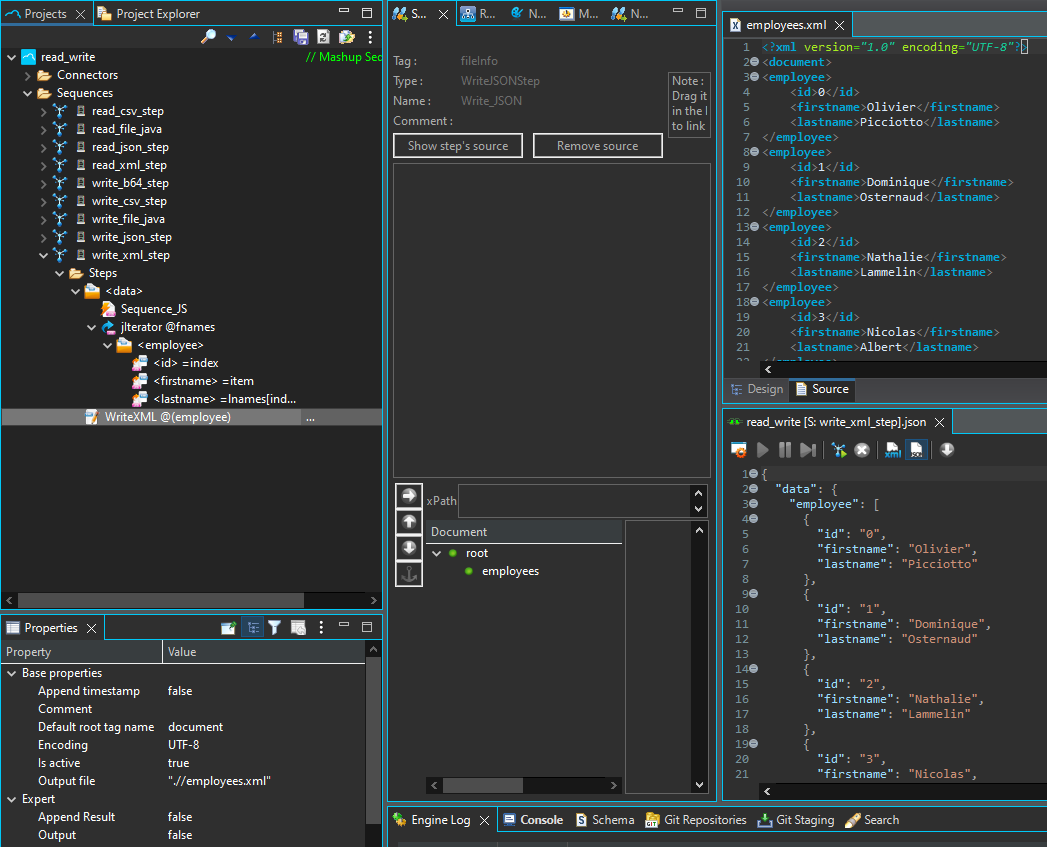
| Property | Description |
|---|---|
| Append timestamp | If true, yyyymmddHHmmssSSS format is concatenated at the end of file name. Default value is false |
| Default root tag name | Defines the root element tag name. Default value is document |
| Encoding | Set the Encoding property with a value for the charset encoding (ISO-8859-1, UTF-8, …). |
| Output file | This property is a Javascript field to fill with a file path. I can be an absolute path or a relative path using ./ (relative to the workspace folder) or .// (relative to the project folder) |
| Append Result | If true, add data result at the end of the file. Default value is false |
Write B64 Binary Step
Use the WriteBase64 Step to write data to a binary file.
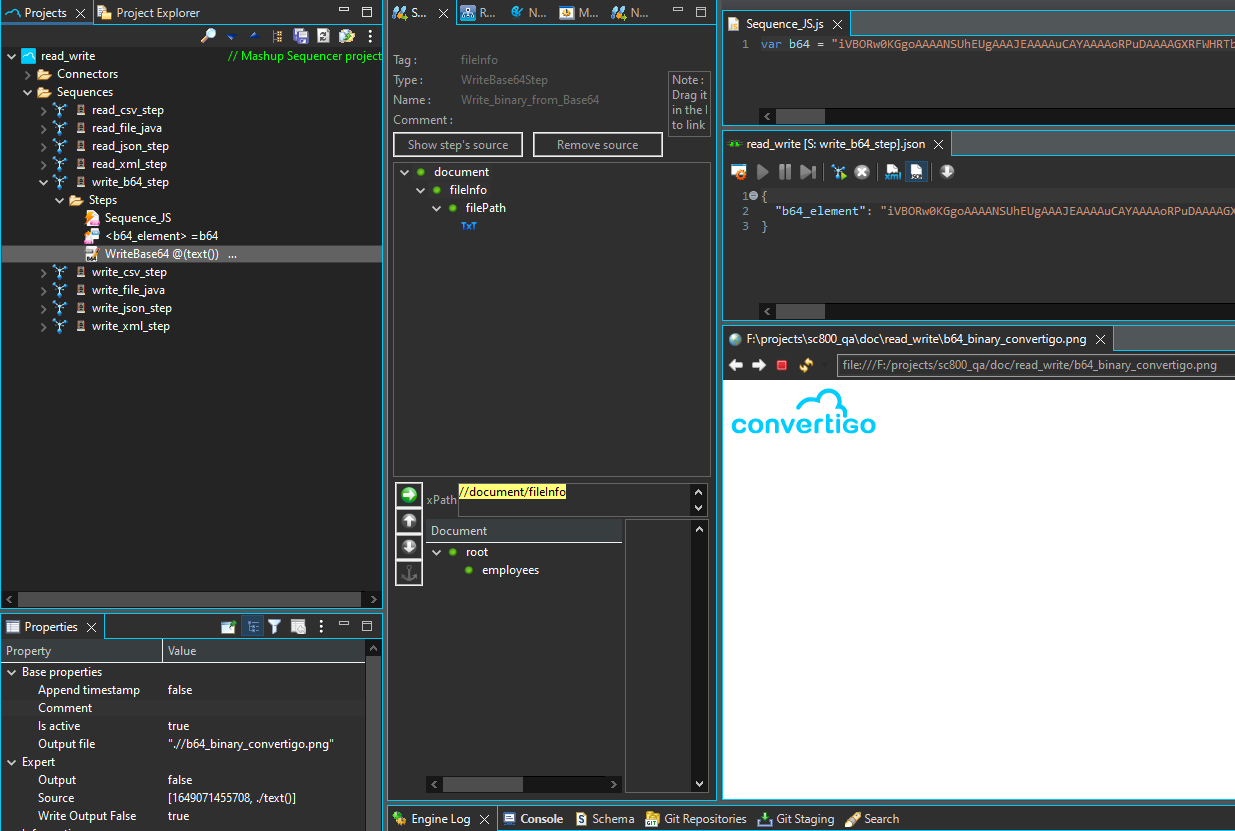
| Property | Description |
|---|---|
| Append timestamp | If true, yyyymmddHHmmssSSS format is concatenated at the end of file name. Default value is false |
| Output file | This property is a Javascript field to fill with a file path. I can be an absolute path or a relative path using ./ (relative to the workspace folder) or .// (relative to the project folder) |
| Source | Defines the source data to write and ste from a reference on a previously existing step in the parent sequence. |
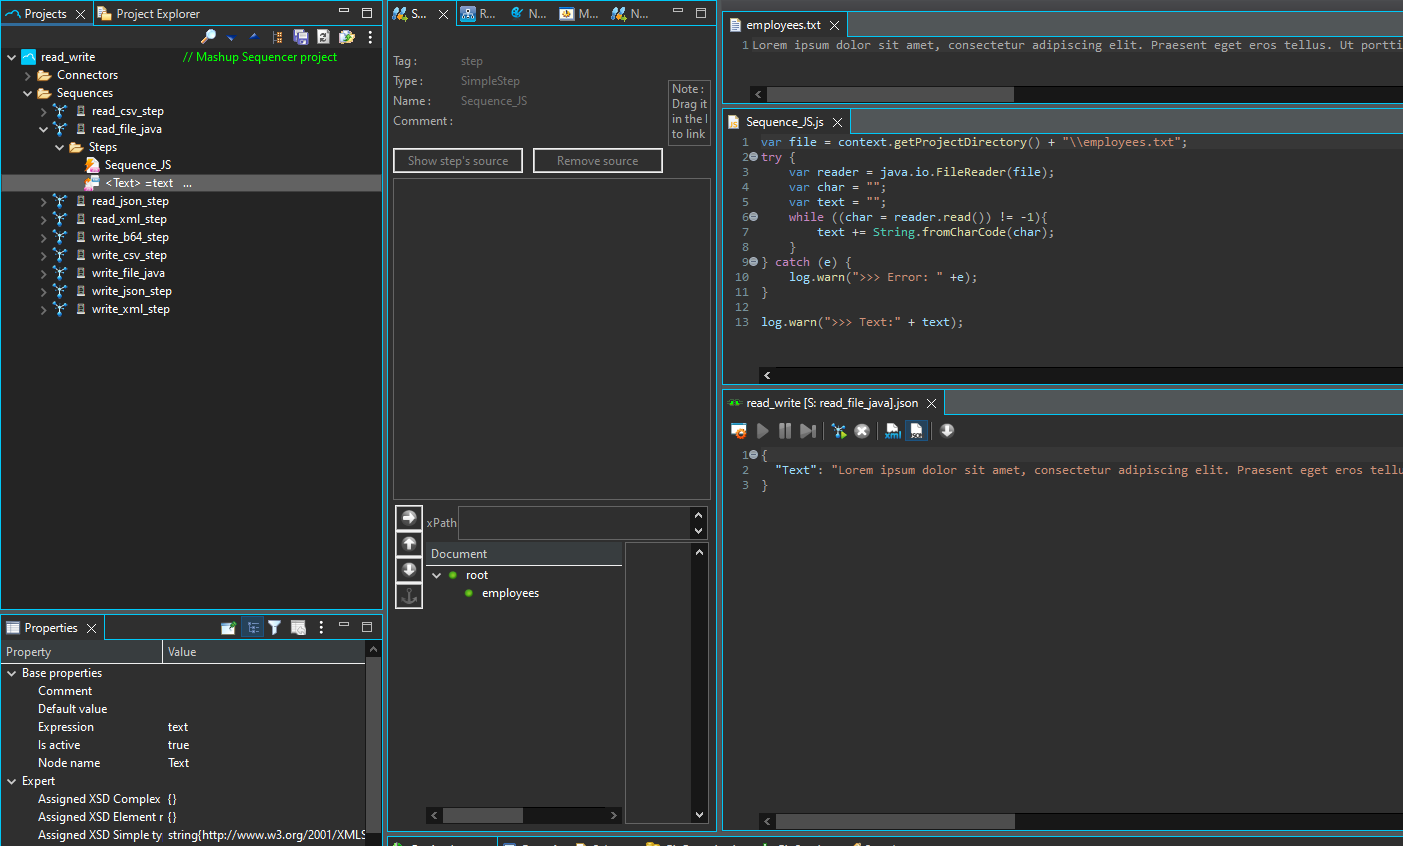
Read Text file
If you need to read data from a Text file or any other data format not covered by existing Steps you can write your own Java code, for example:
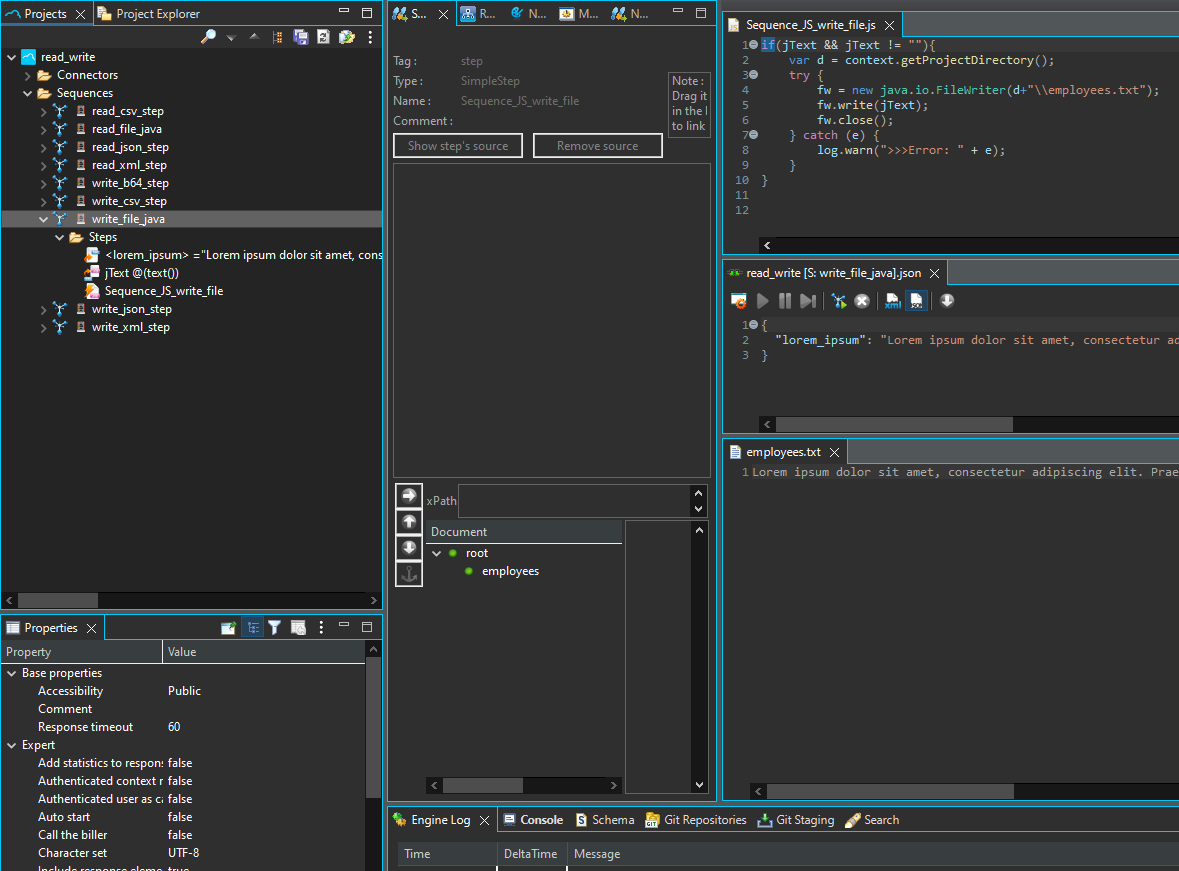
Write Text file
If you need to write data to a Text file or any other data format not covered by existing Steps you can write your own Java code, for example:
Understanding session management
A Session represents the relation between a Convertigo Server Client (Mobile App, Web App or API Consumer) to the Backend. Each time a client invokes a backend service a session is established. Sessions a kept in the Convertigo Server tables and represented as HTTP Cookies on the front side. If A Client provides the same Cookie he received from a previous backend service invocation in a new Service invocation, he will be attached to the same session.
Sessions enables Stateful programming having the Convertigo Server to hold some backend client data across multiple service invocations. This dose not mean that Stateful programming is mandatory, you can also be stateless by explicitly destroying sessions after each service invocation.
Sessions are automatically handled by Convertigo Server and are kept alive using the HTTP session Timeout property in the project (See Project Object). If no requests come from a client for a given session after the Timeout, the session will be automatically closed.
Stateful programming
This is the default mode for Convertigo Applications. When a client invokes a service (Sequence), a session will be established between this client and the Convertigo server. All subsequent calls will be done within this same session.
One of the main usage of sessions are Authentication mechanisms. By default sessions are not Authenticated, preventing Sequences having having the Authenticated context required property set to true to run. At any time, If a Sequence calls the SetAuthenticatedUser step, the session will be authenticated and any Sequence having the Authenticated context required property set to true will be allowed to run.
As the the current Authenticated user is kept in the session, you can at any type use the GetAuthenticatedUser step to retrieve the current authenticated user from the session. You can also use the the session steps to store and retrieve data from the session.
| Step | Description |
|---|---|
| GetFromSession | Get A String from the current Session |
| GetObjectFromSession | Get a JavaScript Object from the current session |
| SetInSession | Set a String an the current session |
| SetObjectInSession | Set a JavaScript Object in the current session |
Stateless programming
Stateless programming is done by just closing the session explicitly after having executed a Sequence. In this case Convertigo server will not hold data across different service (Sequence) invocations. This is some time used in RESTful APIs contexts where the State is held on the client side. In this mode your Sequences must be authorized to run un authenticated, so be sure the Sequences’s Authenticated context required property are set to false.
Also you will be responsible for checking if the Sequence is allowed to to run in the business flow itself by checking a Token API key or whatever the client will provide you.
To explicitly close a session after a Sequence execution add as the last step a RemoveSession Step.
Setting up FullSync on back-ends
Importing data to FullSync databases
Creating Views on data
Monitoring client data changes
Miscellaneous backend steps
Optionally expose Services as RESTful services
Deploying & testing projects on Servers
Debugging & Monitoring
Debugging a sequence can consist of adding Log steps or more complex custom logs throughout its execution. It is also possible to perform a Step by Step execution of a sequence by using its Debug mode feature.
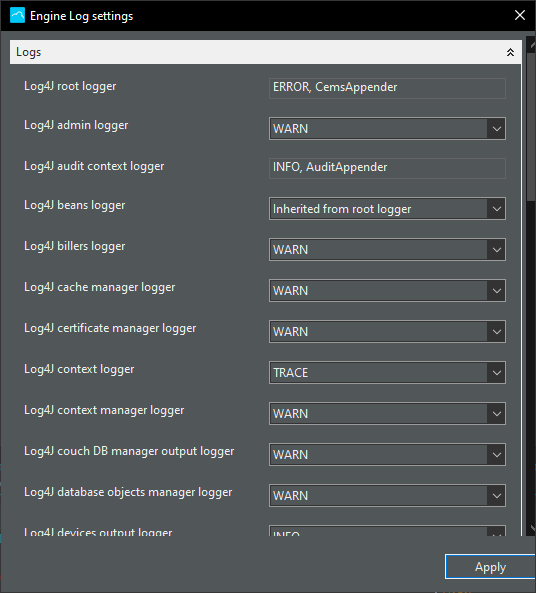
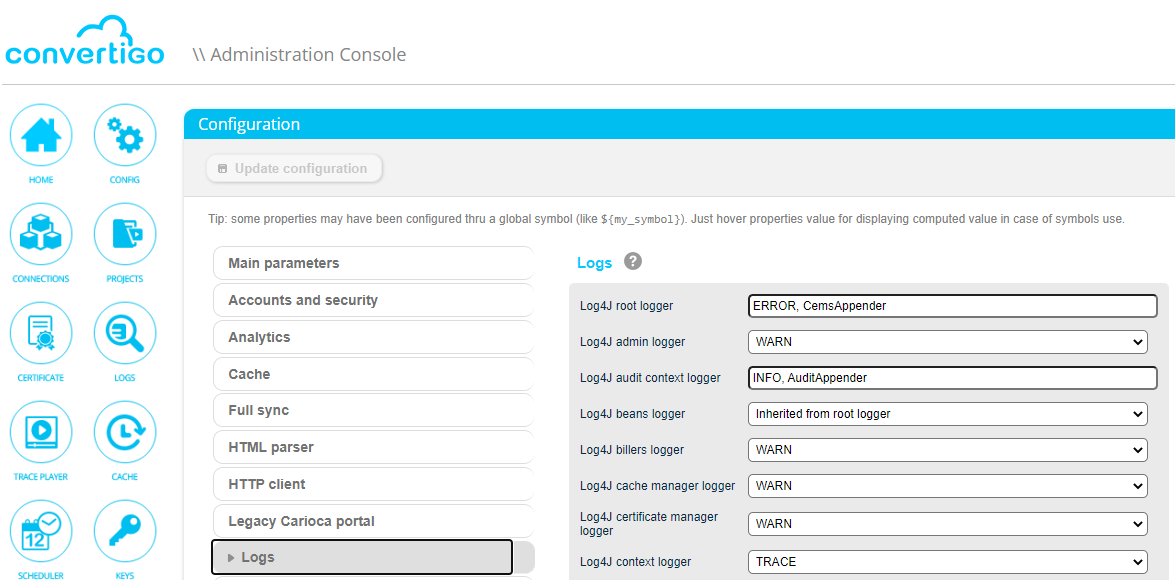
Setting log levels
Setting log levels for the different loggers will permit you to debug your sequences or to see only important your custom logs as milestones throughout execution. Lowering log levels will be used to save CPU and I/O disk, but debugging an application will be harder. Raising log levels will consume more CPU, I/O disk ans disk space, but it will be easier to debug an application or to follow the application flow. Each log levels display logs from ERROR up to the target level. ERROR is the lowest log level and TRACE is the higher.
Studio
Server
Adding custom logs
Throughout sequence execution you can add Logs Steps to place different messages, data or debug values in Convertigo logs.
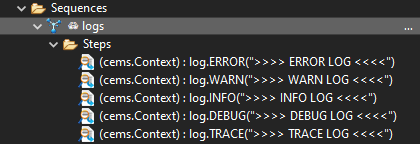

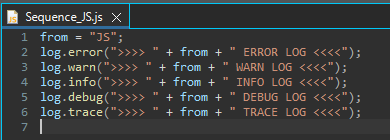
You may also use the log object in a sequence JS step to add logs when using more complex code. The different log methods are error(String), warn(String), info(String), debug(String), trace(String). They affect the Context logger.

Note: To be able to see your different log levels, you must set the target logger high enough to see logs and below levels. For example, if you set the Context logger level to WARN, you will only see logs ERROR and WARN. If you set it to TRACE you will see ERROR, WARN, INFO, DEBUG and TRACE logs. See Setting log levels for more details.
Debug mode
Convertigo integrates a Step by Step Sequencer debugger.
Double-click a Sequence to open its interface in the right panel.
You will see a toolbar with buttons:
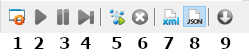
- Debug mode toggle button: To activate/deactivate debug mode.
- Continuous debug mode button: Stops Step by Step mode and execute all Steps continuously.
- Pause the debug process button: Pauses the Continuous debug mode.
- Step by step debug mode button: Click here to execute and reach next Step in Sequence.
- Execute again button: Launches the debug of the Sequence.
- Stop the current sequence button: Stops execution of the Sequence.
- XML requester button: Will output Sequence response ton XML format.
- JSON requester button: Will output Sequence response ton JSON format.
- Show the full result button: In case of big response, it is truncated. Click this button to dysplay full response in viewer.
To debug a Sequence, first step is to click the Debug mode button (1).

Next step is to click the Execute again button (5)
Then, to proceed each Steps step by step, you will click the Step by step debug mode button. The current Step will be highlighted in green.
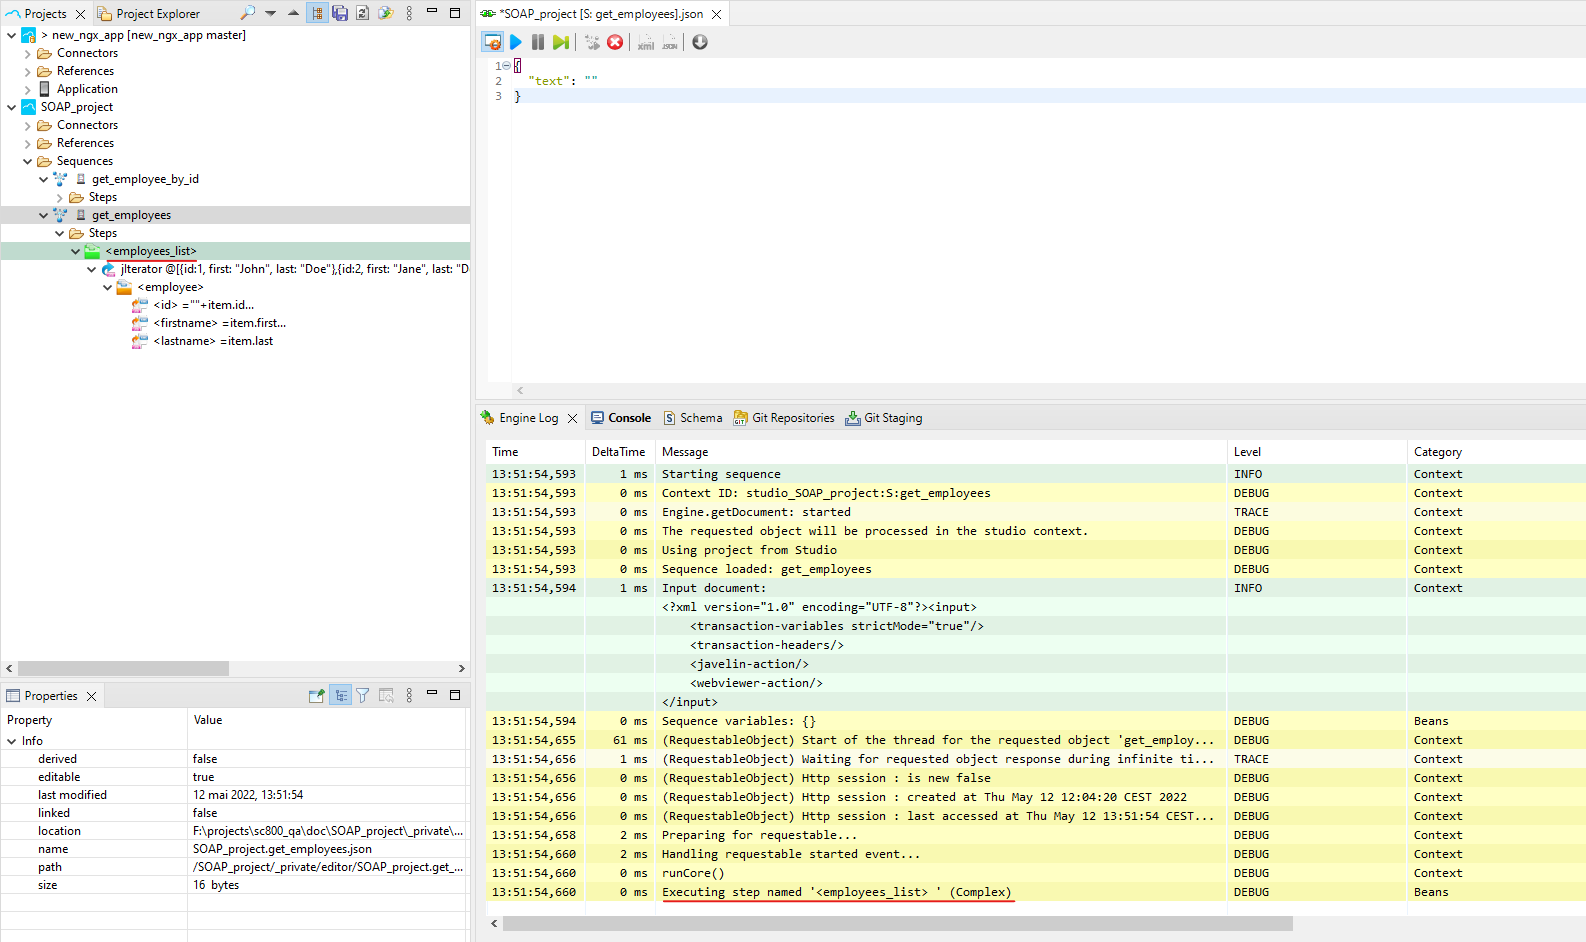
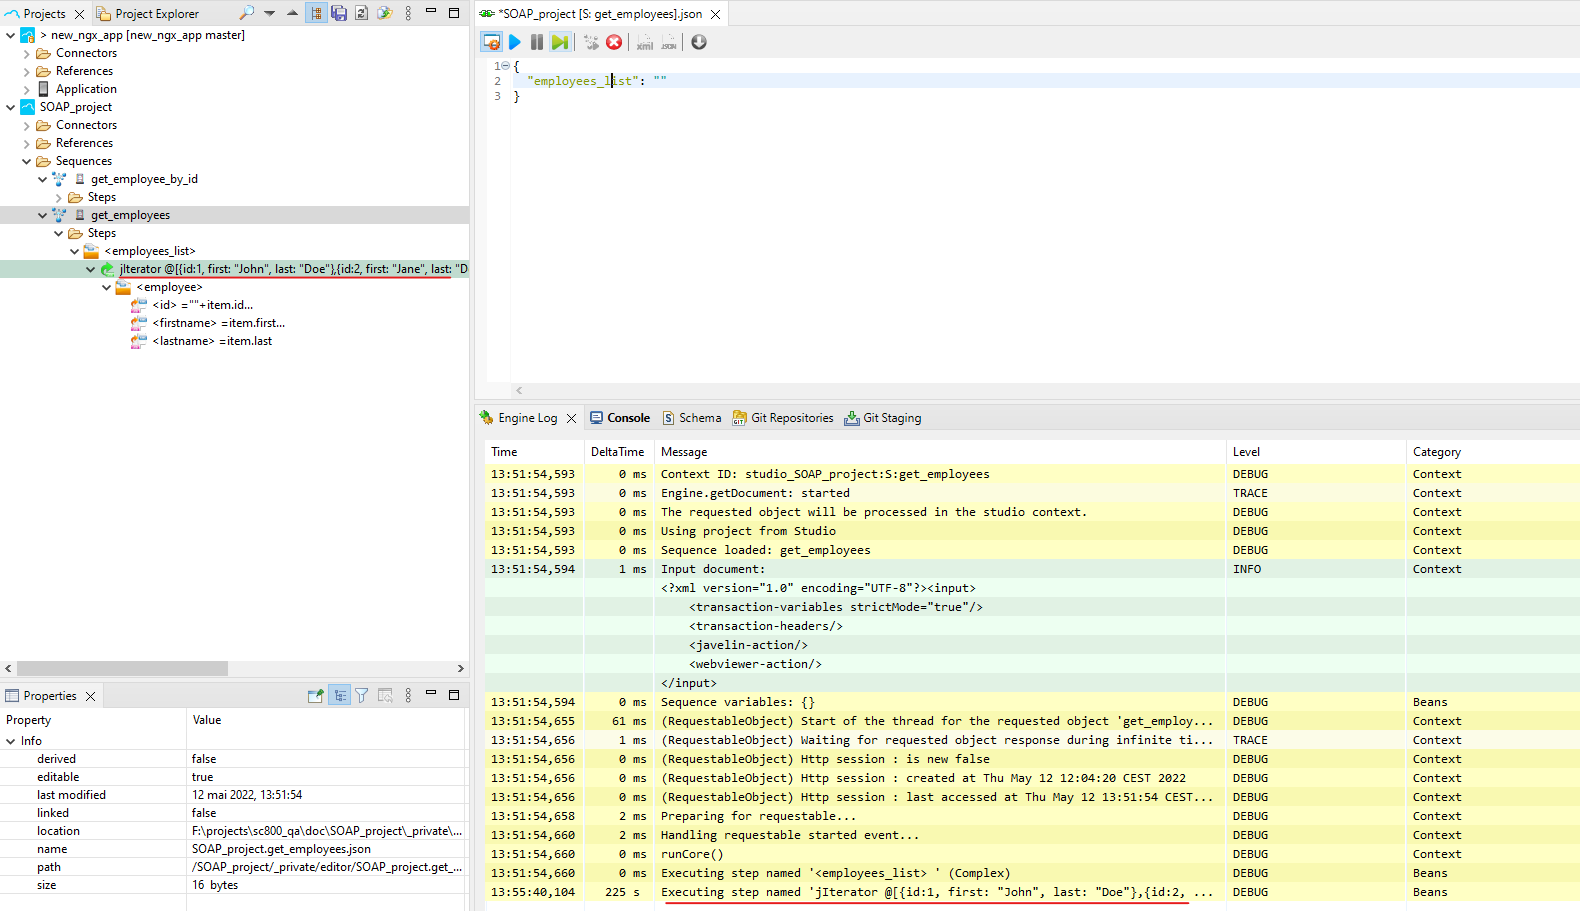
The Sequence response will also be displayed step by step.
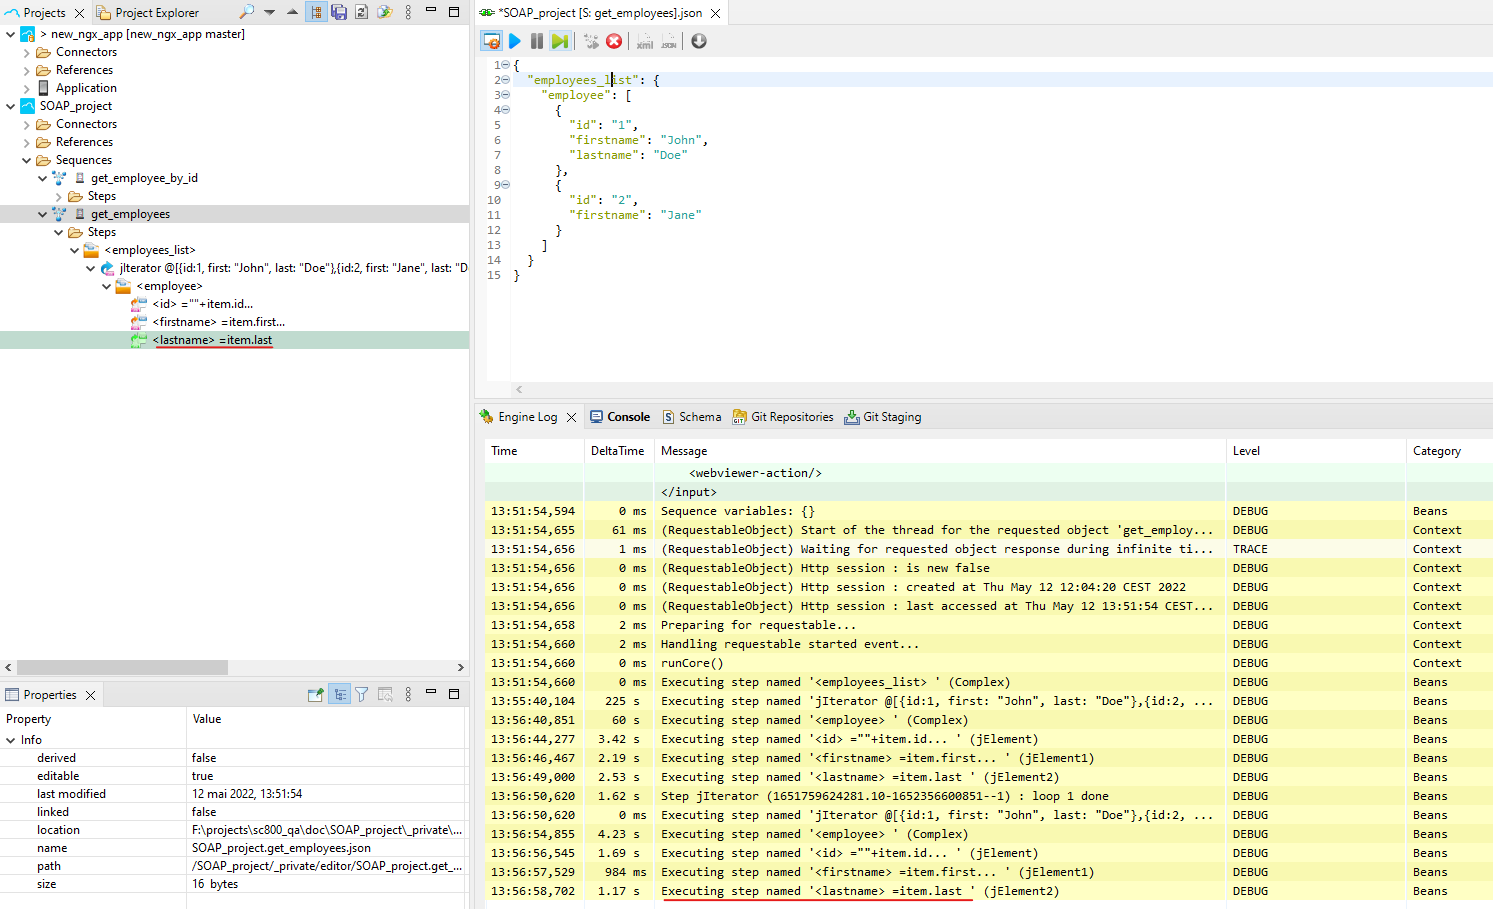
Finally, when reaching the last Step in Sequence you will get the response in the viewer.